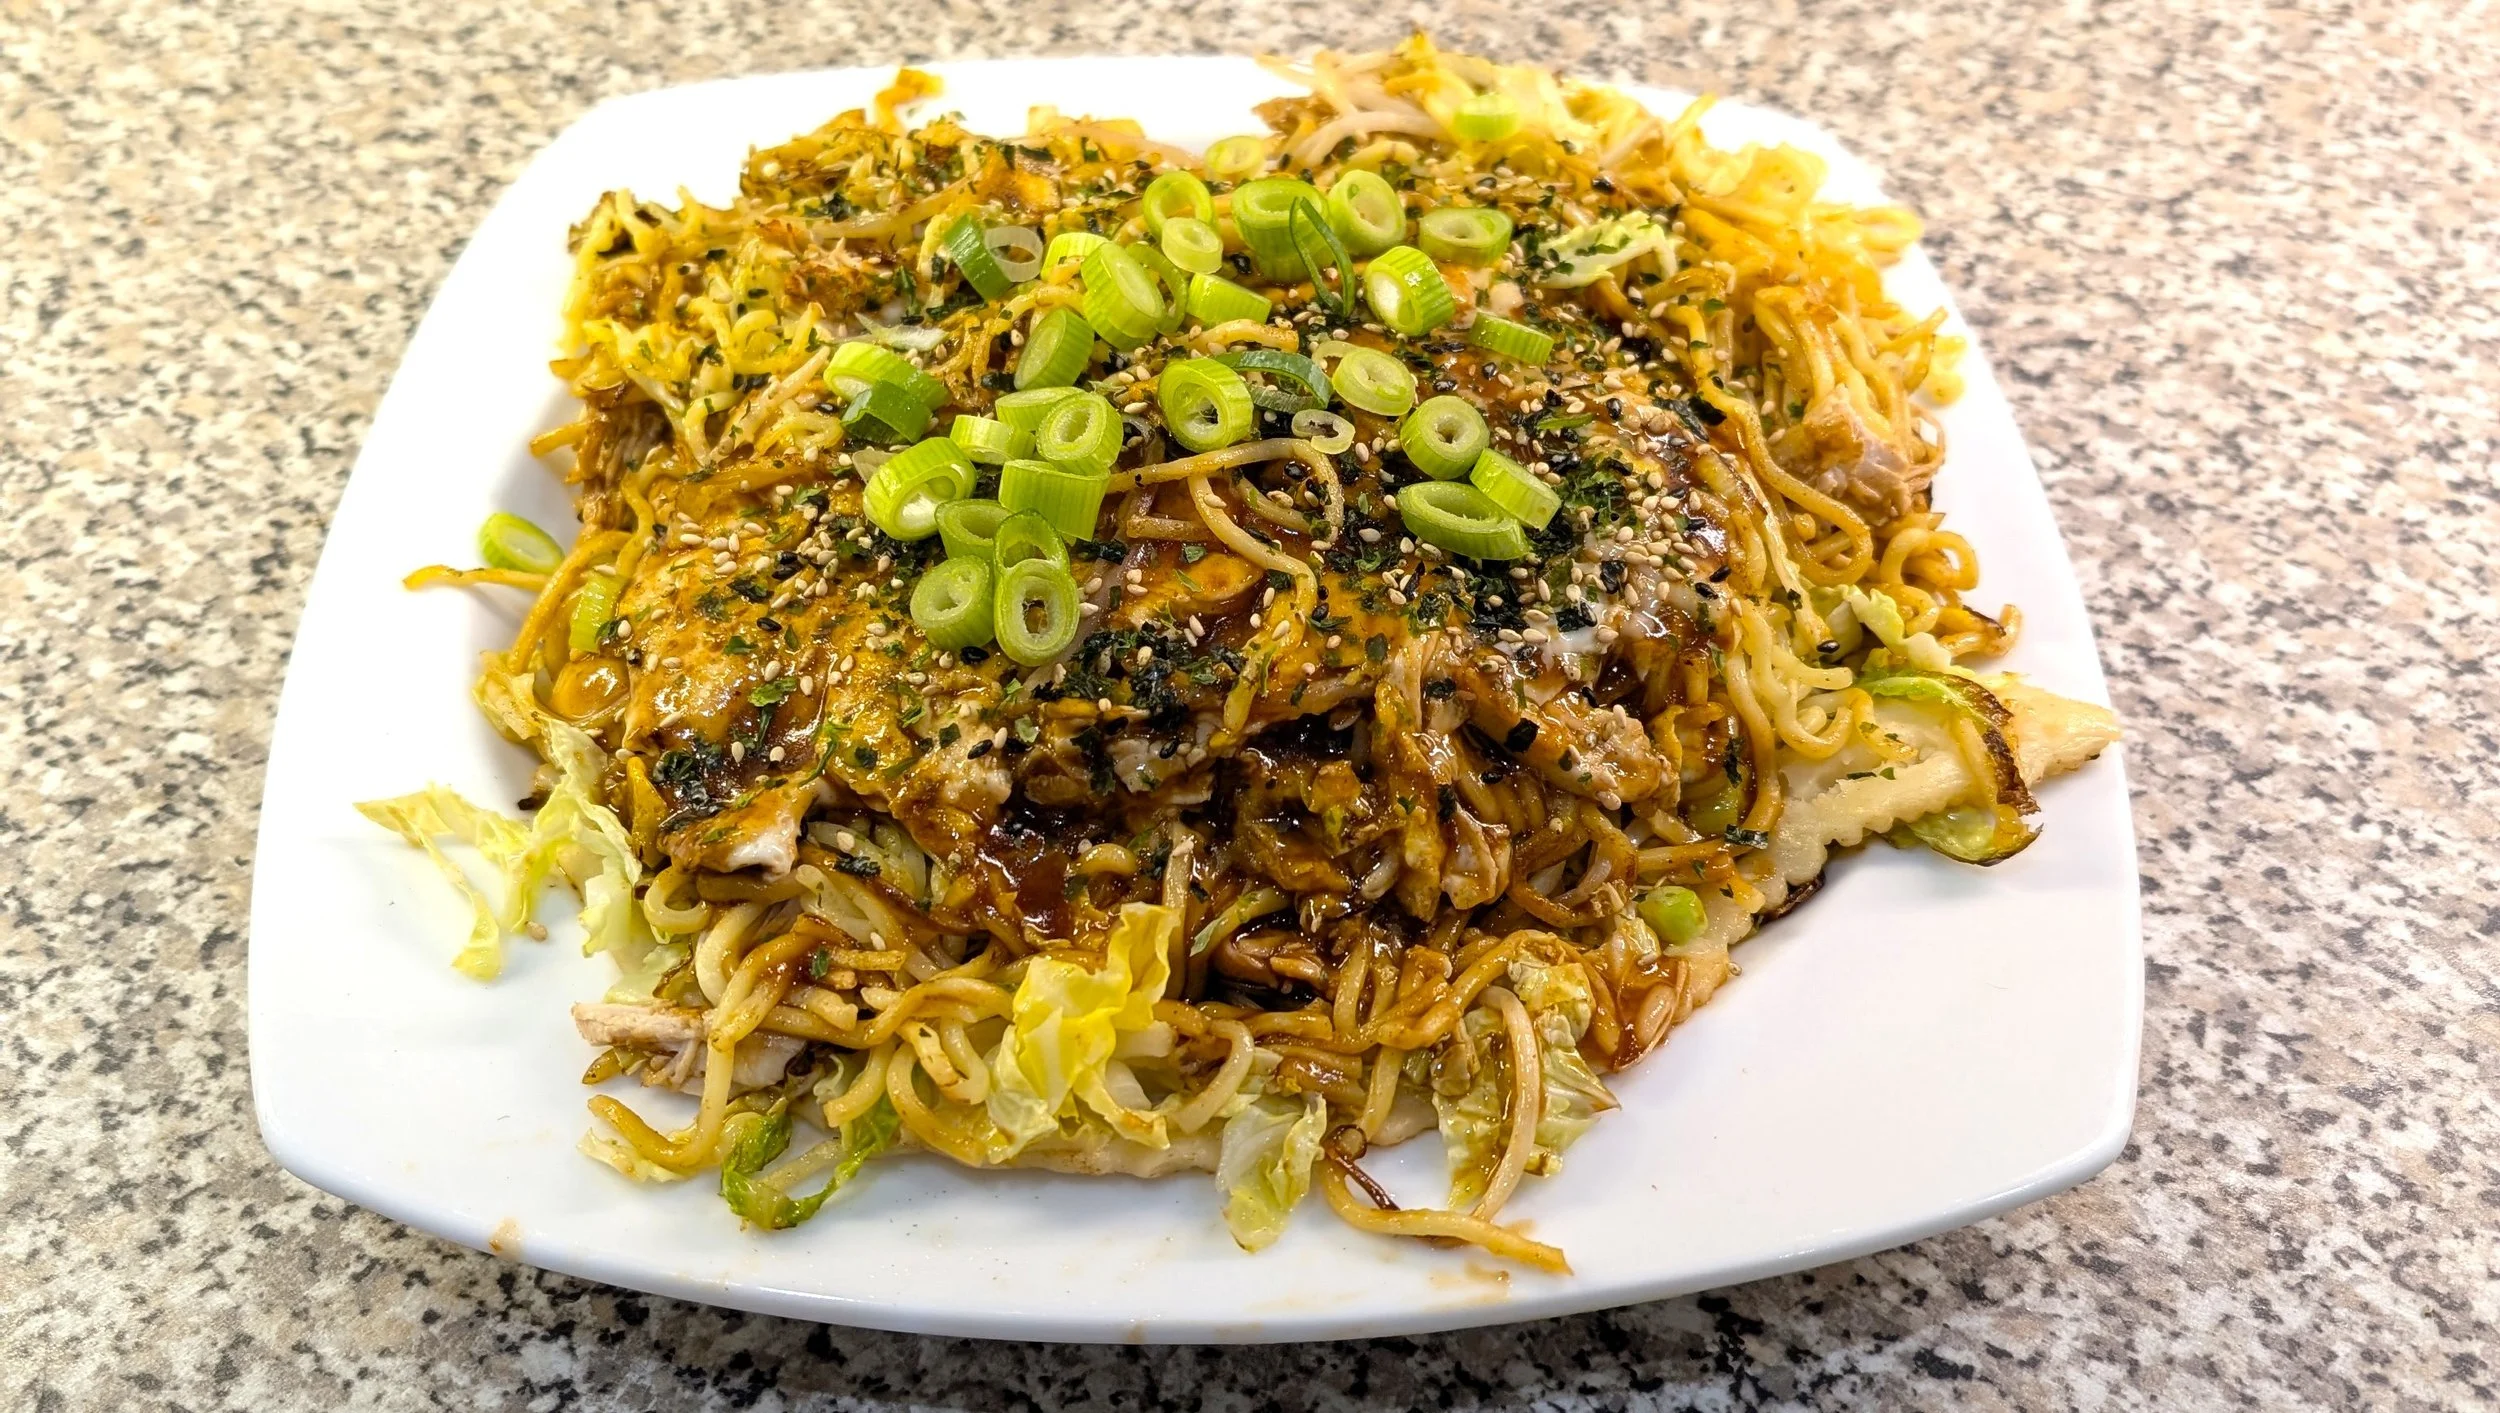
Hiroshima-style Okonomiyaki
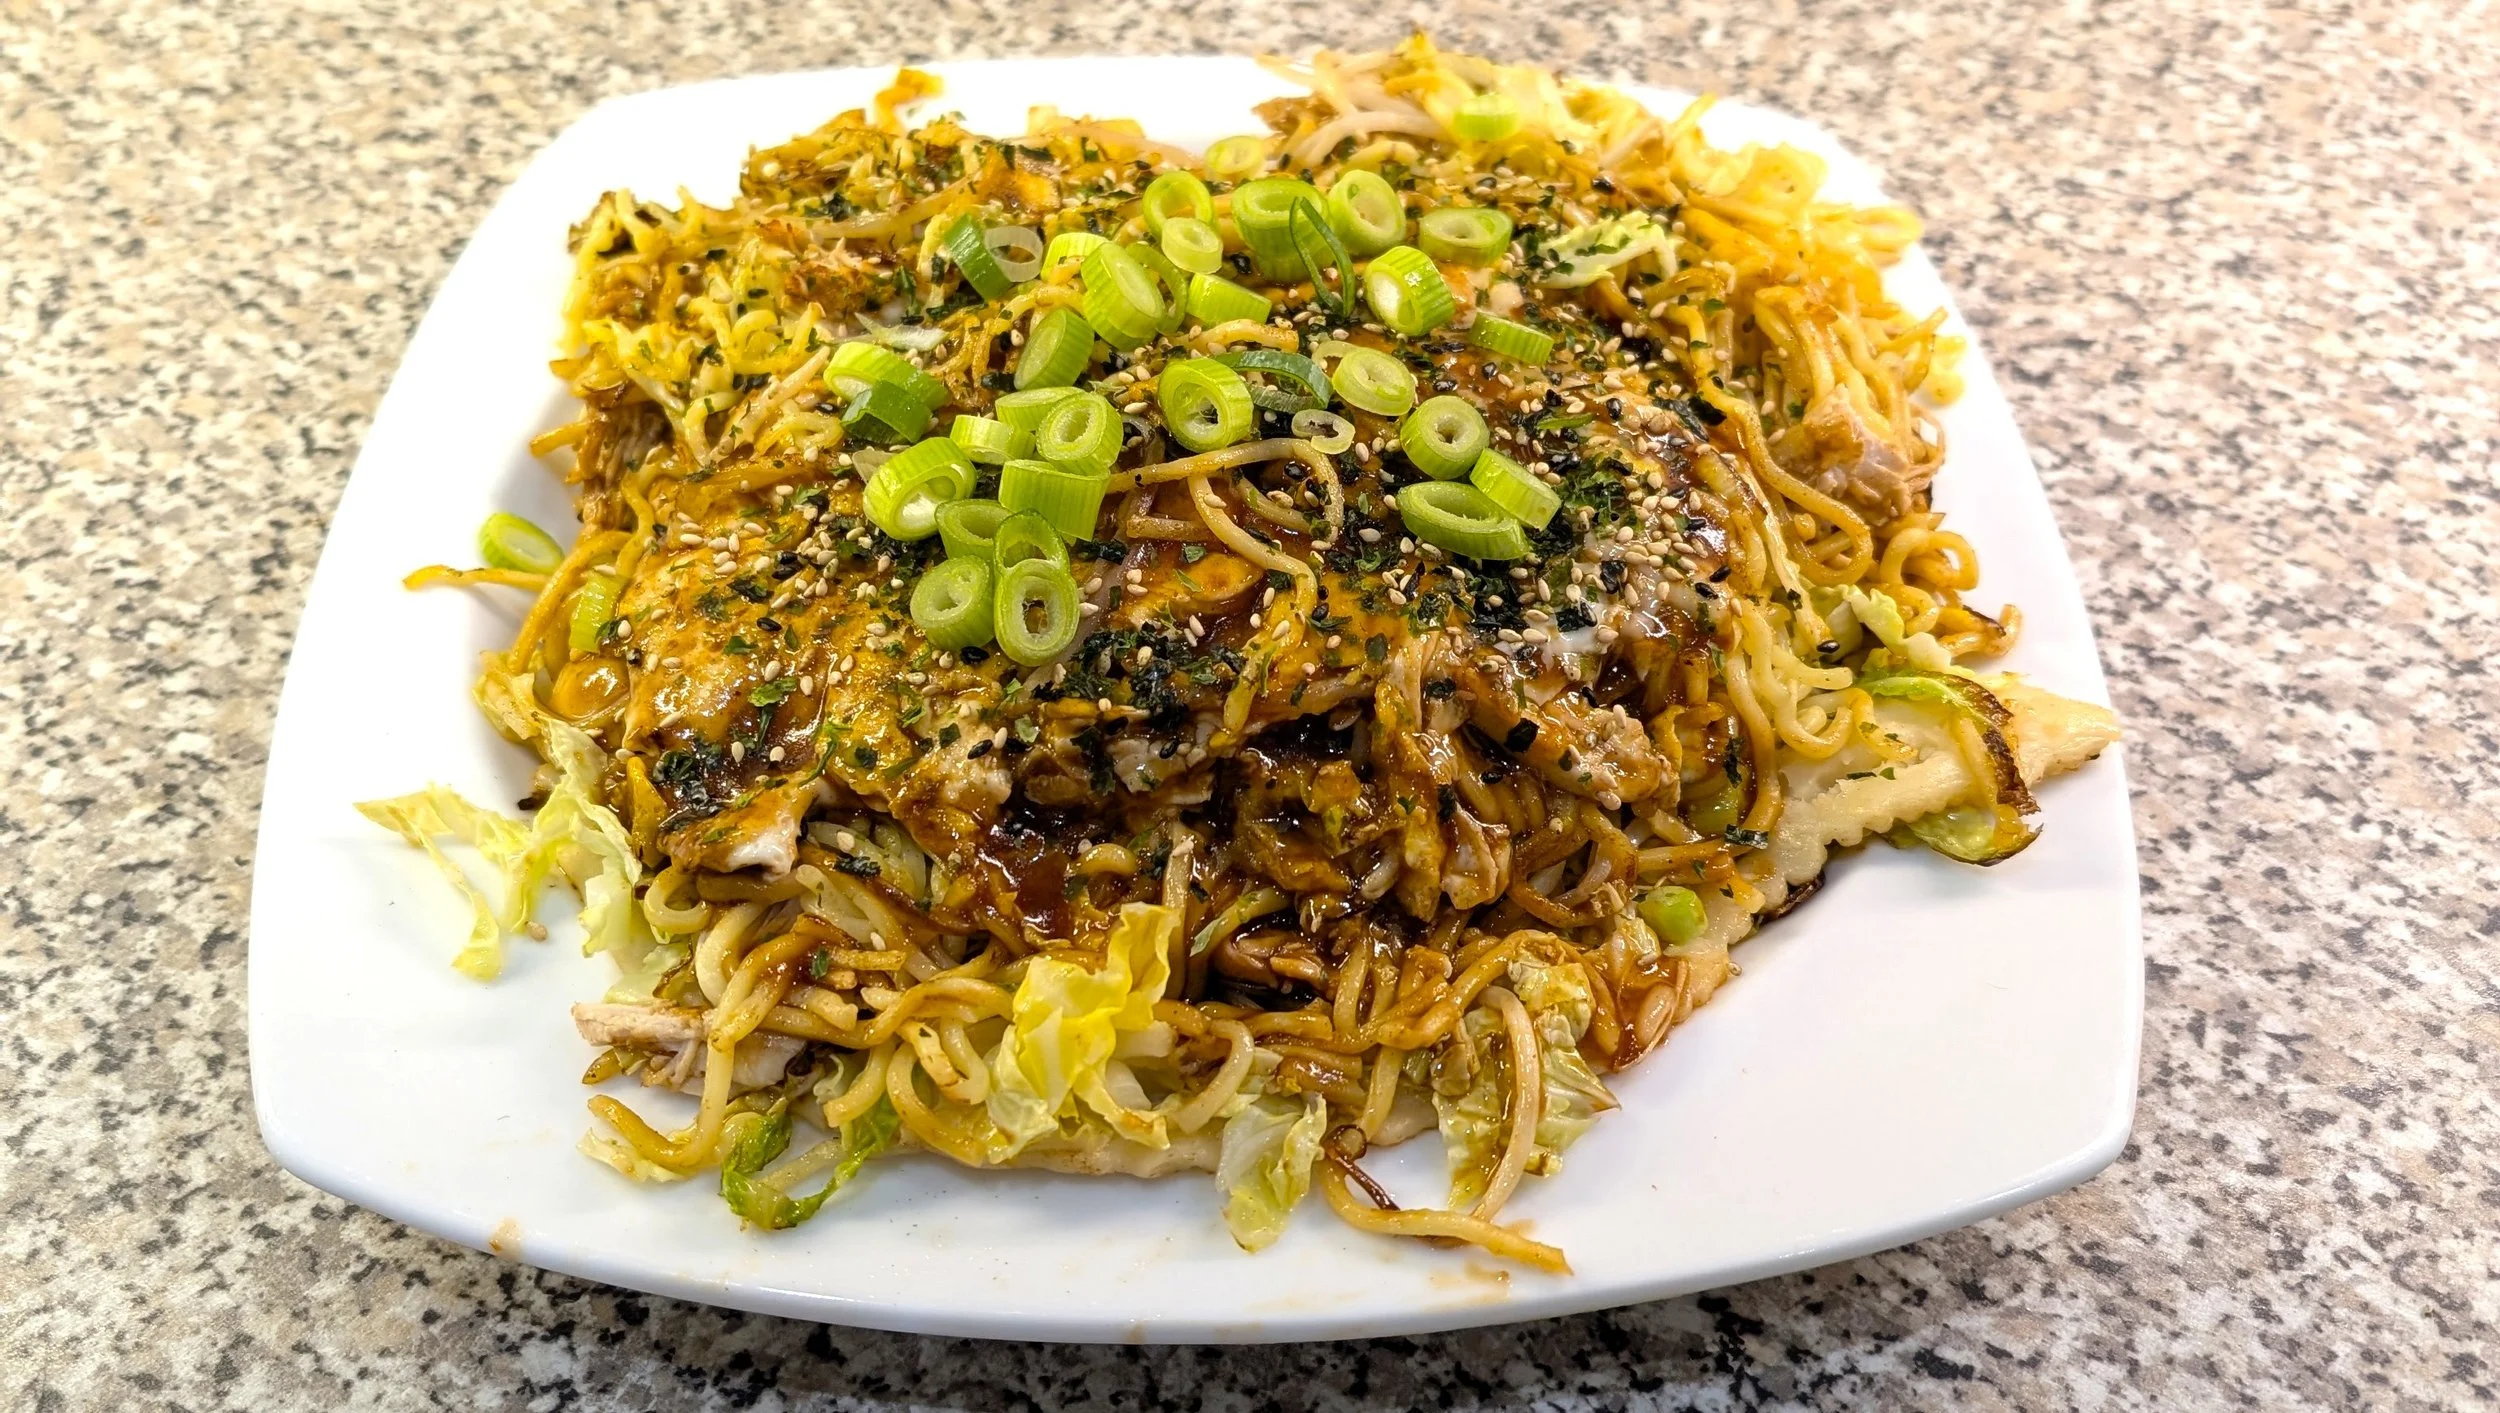
This is one of those meals where the theatricality of the cooking is half the fun – but the end result is also very satisfying! These Japanese fried-noodle pancakes can be made with whatever ingredients you fancy, but my favourite is based around the pulled chicken.
Preparation time: Around 20 minutes
Cooking time: Around 70 minutes (30 mins in the oven, 10 mins for each okonomiyaki)
During a trip to Japan, I sampled both variations of the traditional okonomiyaki – and while I enjoyed the more widespread Osaka-style version (where the ingredients are mixed directly into the batter to make a thicker savoury pancake, which has earned it the nickname “Japanese pizza”), I personally preferred the Hiroshima-style version, where the ingredients are layers on a thin pancake with fried noodles.
I’m not going to lie – this one is a bit fiddly … but half the fun of the teppanyaki approach to cooking is that the cooking itself is all part of the experience! With that in mind, you may need to invest in a couple of extra large spatulas, and I although I cook this on a hotplate, the recipe should work just as well in a couple of large frying pans. The authentic Japanese ingredients are relatively easily available these days online or in specialist supermarkets, but if you can’t find them, you can easily swap ingredients out for your personal preferences.
Ingredients (serves 4):
3 chicken breasts (or other protein source of your choice)
100g plain flour
120ml water
5 eggs
1 green or white cabbage
Spring onions (1 bunch)
75g beansprouts
Yakisoba noodles (4 x 150g straight-to-wok pouches)
Okonomiyaki sauce (aka okonomi sauce for short)
Furikake seasoning (sesame seeds and seaweed)
Vegetable oil (for cooking)
Method:
1. If you’re making this using pulled chicken as your protein source, heat the oven to 180˚C, place the chicken breasts in a foil “tent” on a baking tray, and cook for around 25-30 minutes. The foil “tent” means the chicken steams more than roasts, and so it doesn’t dry out while it cooks. Once it’s cooked, you can shred the chicken on a chopping board (you should be able to just pull it apart using a couple of forks), and then set it aside;
2. Note #1: if you’re using another protein source that doesn’t need to be pre-cooked, you can skip the above steps and lay the protein on top of the cabbage/beansprouts/spring onions in step 6, before you flip the pancake in step 7;
3. Mix the flour, water and 1 egg together, and whisk to make a smooth batter. Cover with clingfilm and refrigerate while you prepare the cabbage (thinly shredded) and the spring onions (sliced, separating the white sections from the green);
4. Note #2: it takes a few minutes to make each one, so you can either dish them up as you go – but if you want to dish them up all together, you may want to pre-heat the over to low and prepare some baking sheets, to keep them warm while you prepare the rest of them;
5. Once you’re ready to begin, heat some vegetable oil on the hotplate (or the first frying pan). When it’s hot, add a small ladle full of the batter – enough to make a thin, plate sized pancake once it’s spread around [photo 1];
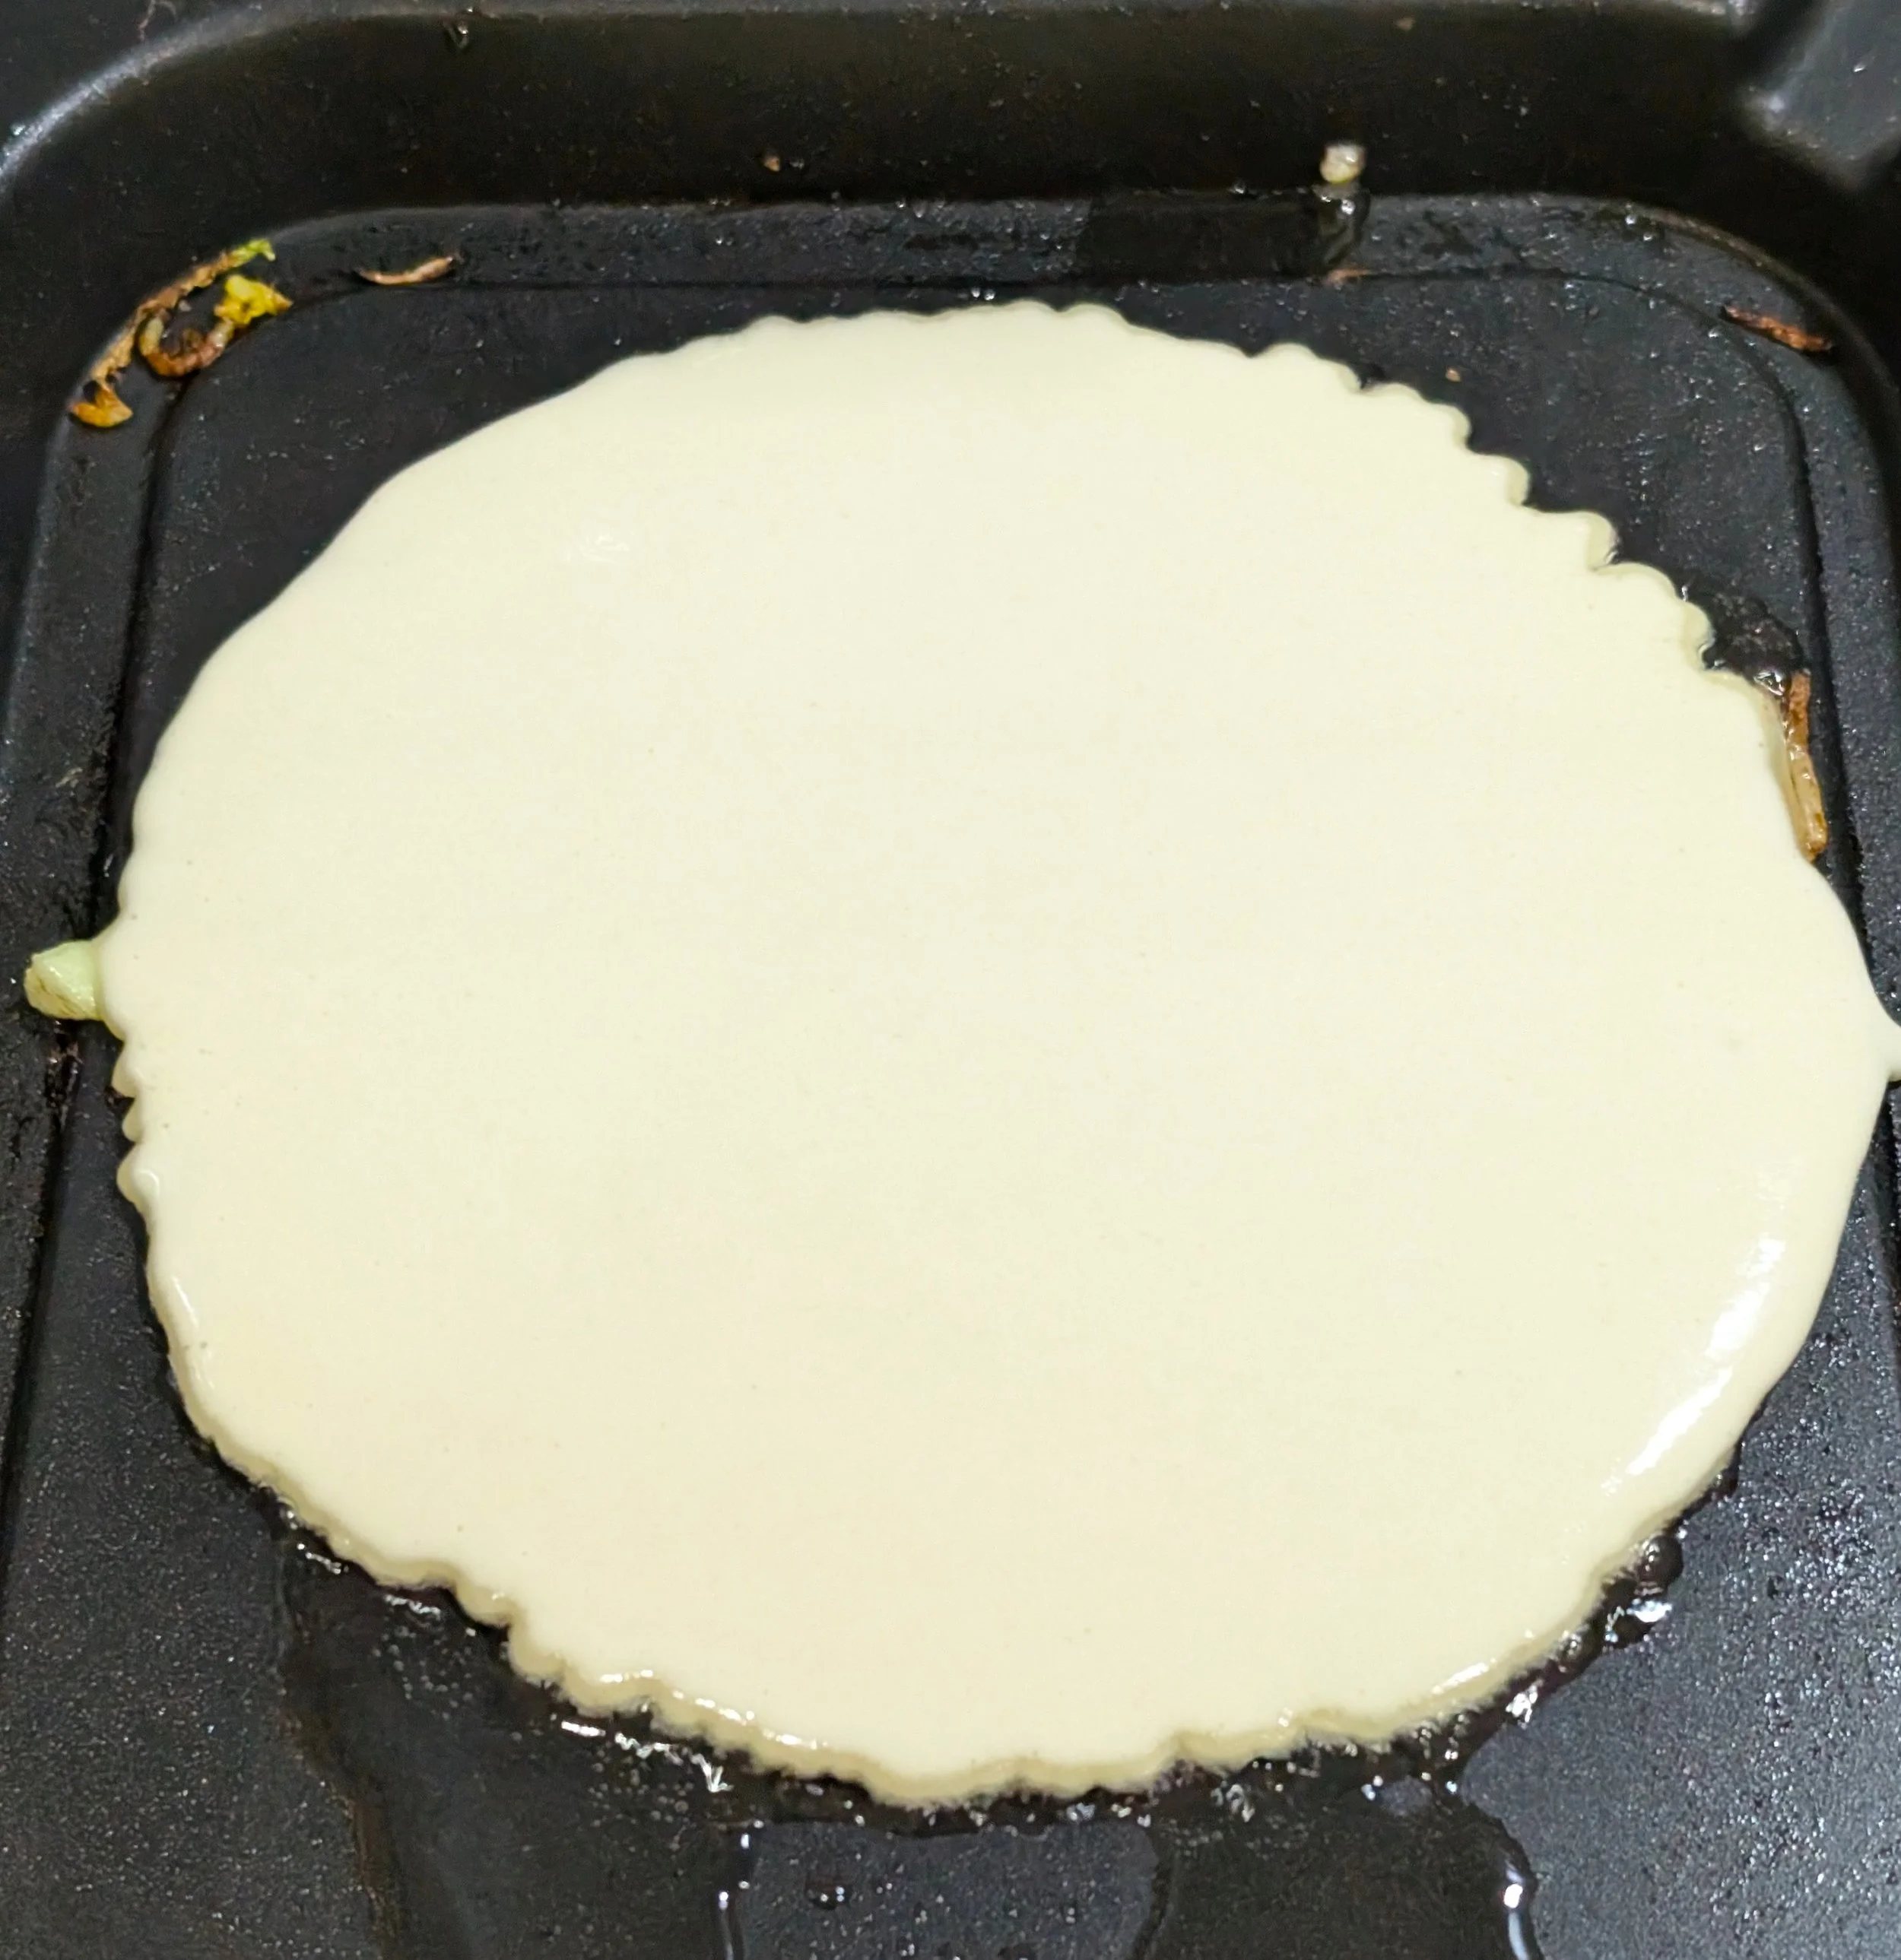
Photo 1
6. Once the batter has started to set, pile on a handful of the shredded cabbage, then a handful of beansprouts, and some of the spring onion whites [photo 2];
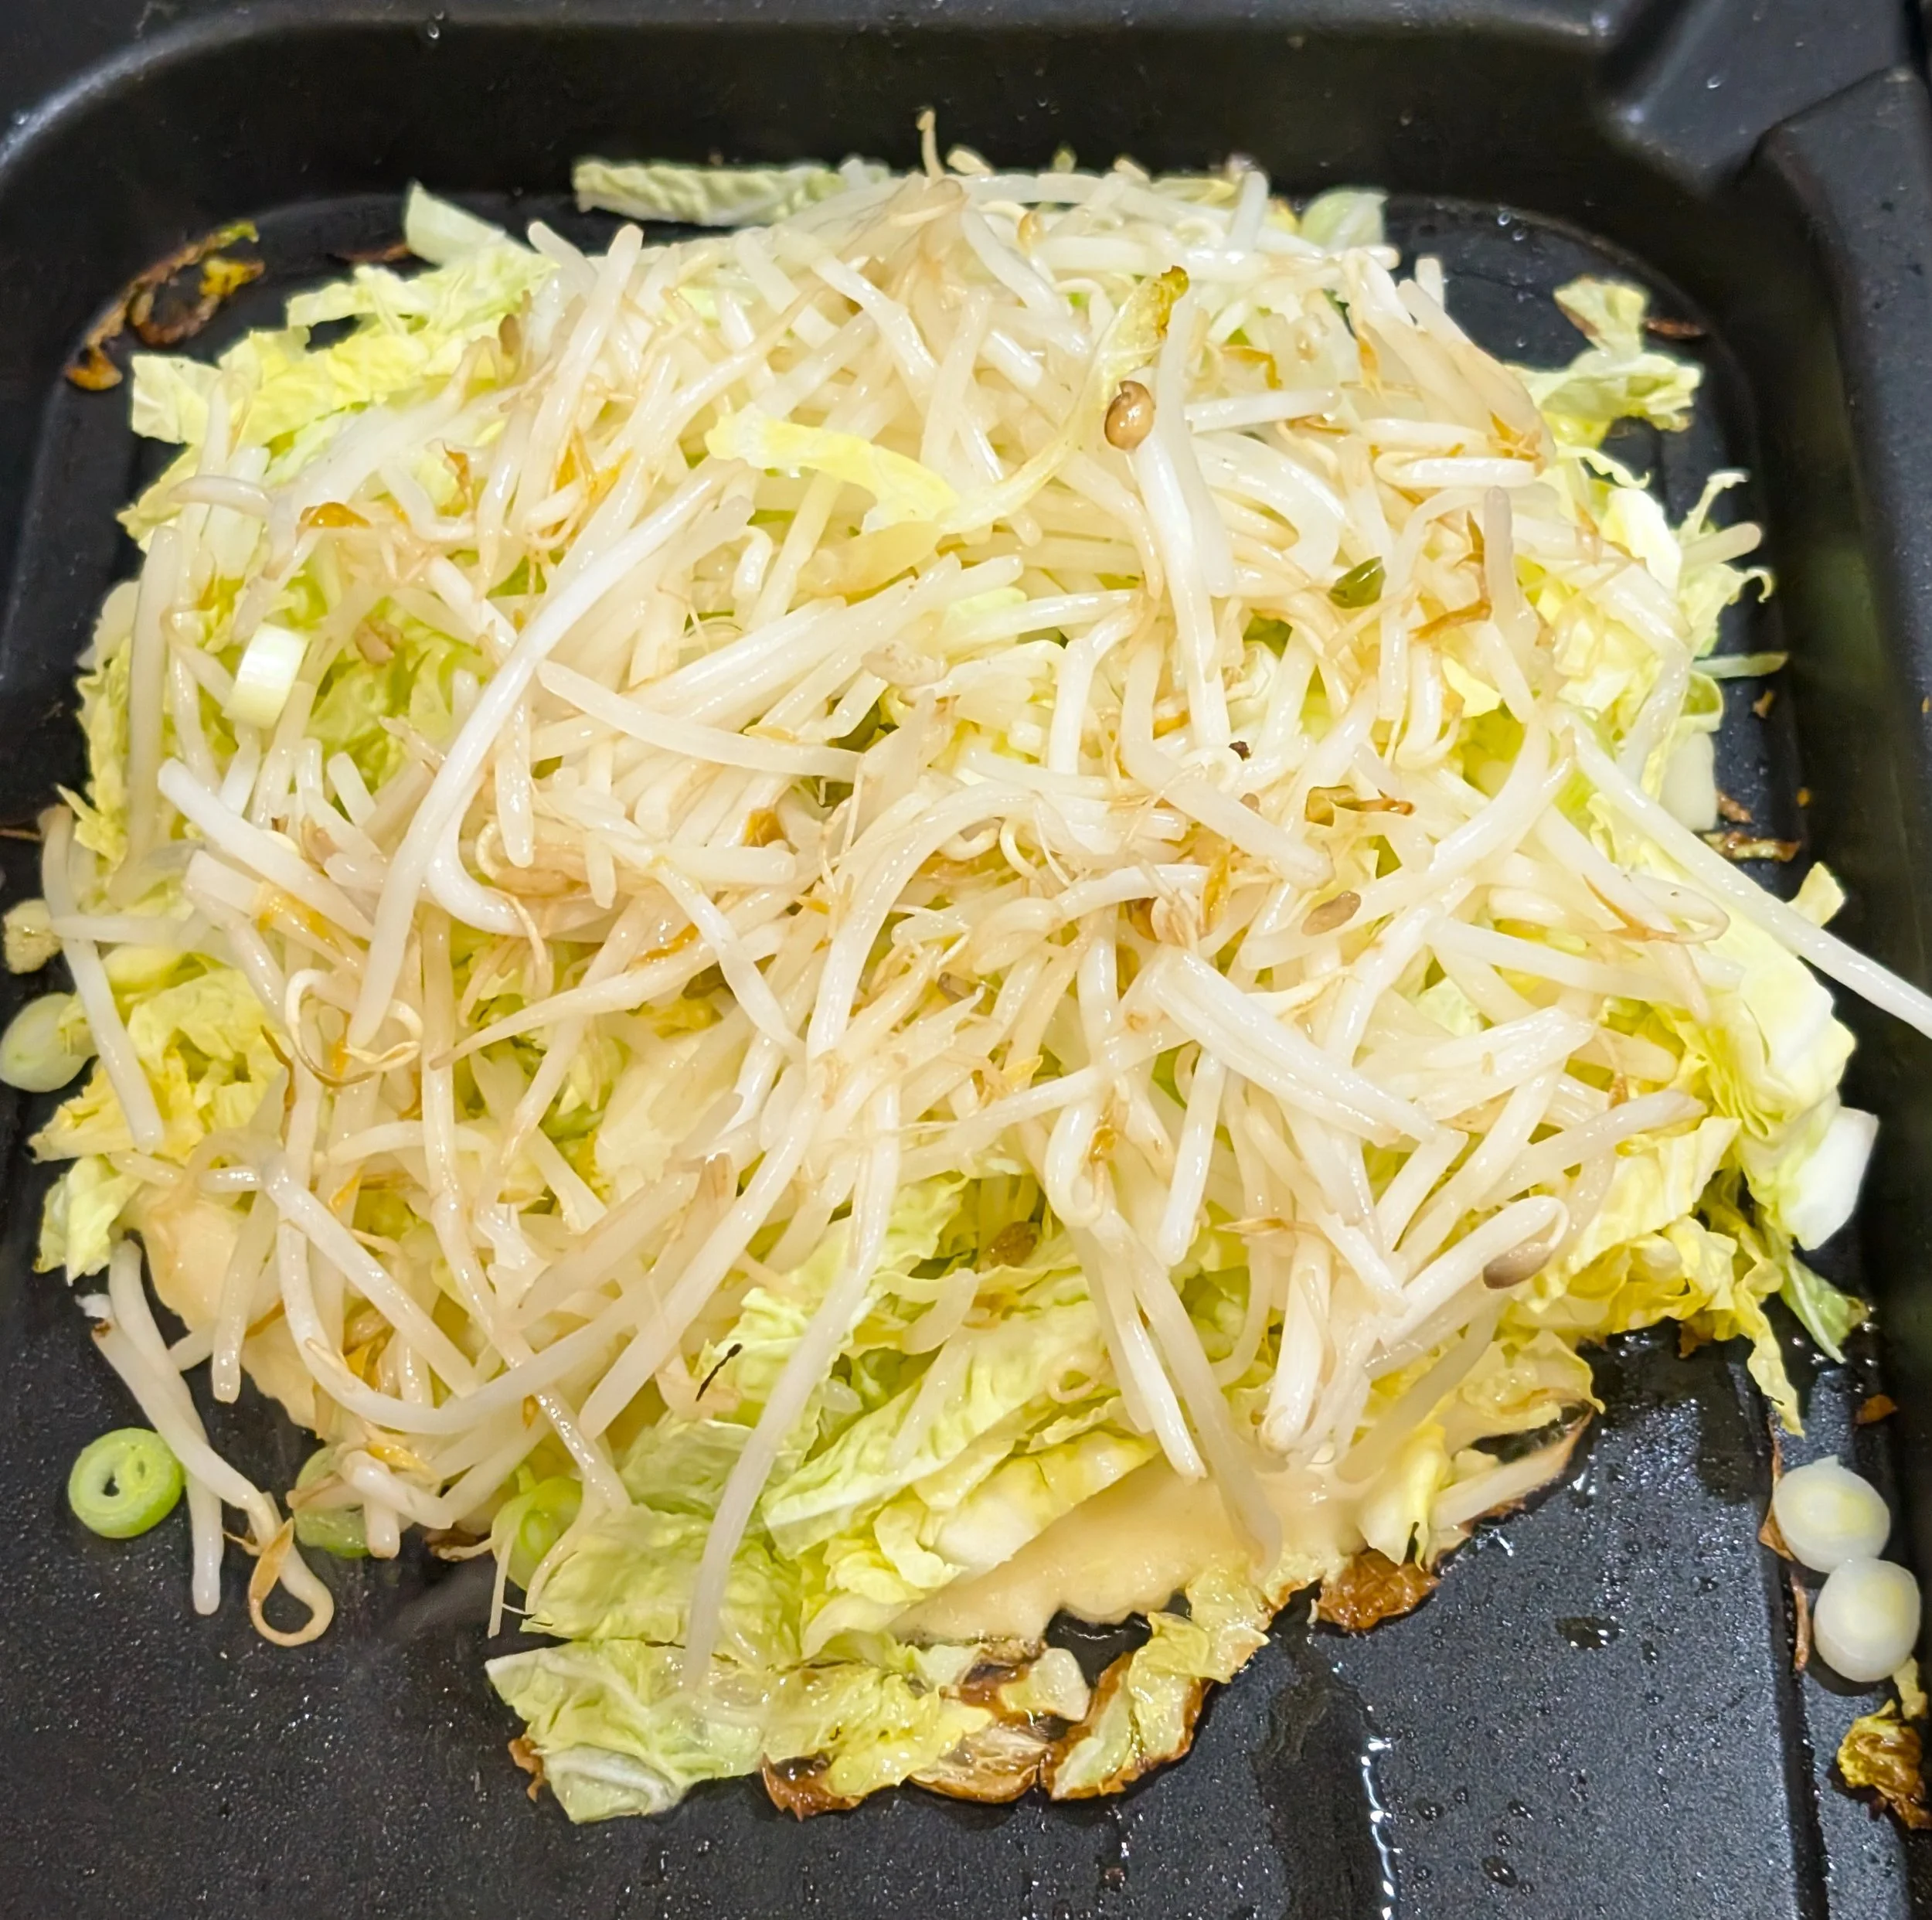
Photo 2
7. At this point, using two (extra large) spatulas, you want to flip the whole thing over (so that the pancake is now on the top, and the beansprouts/cabbage are cooking underneath [photo 3];
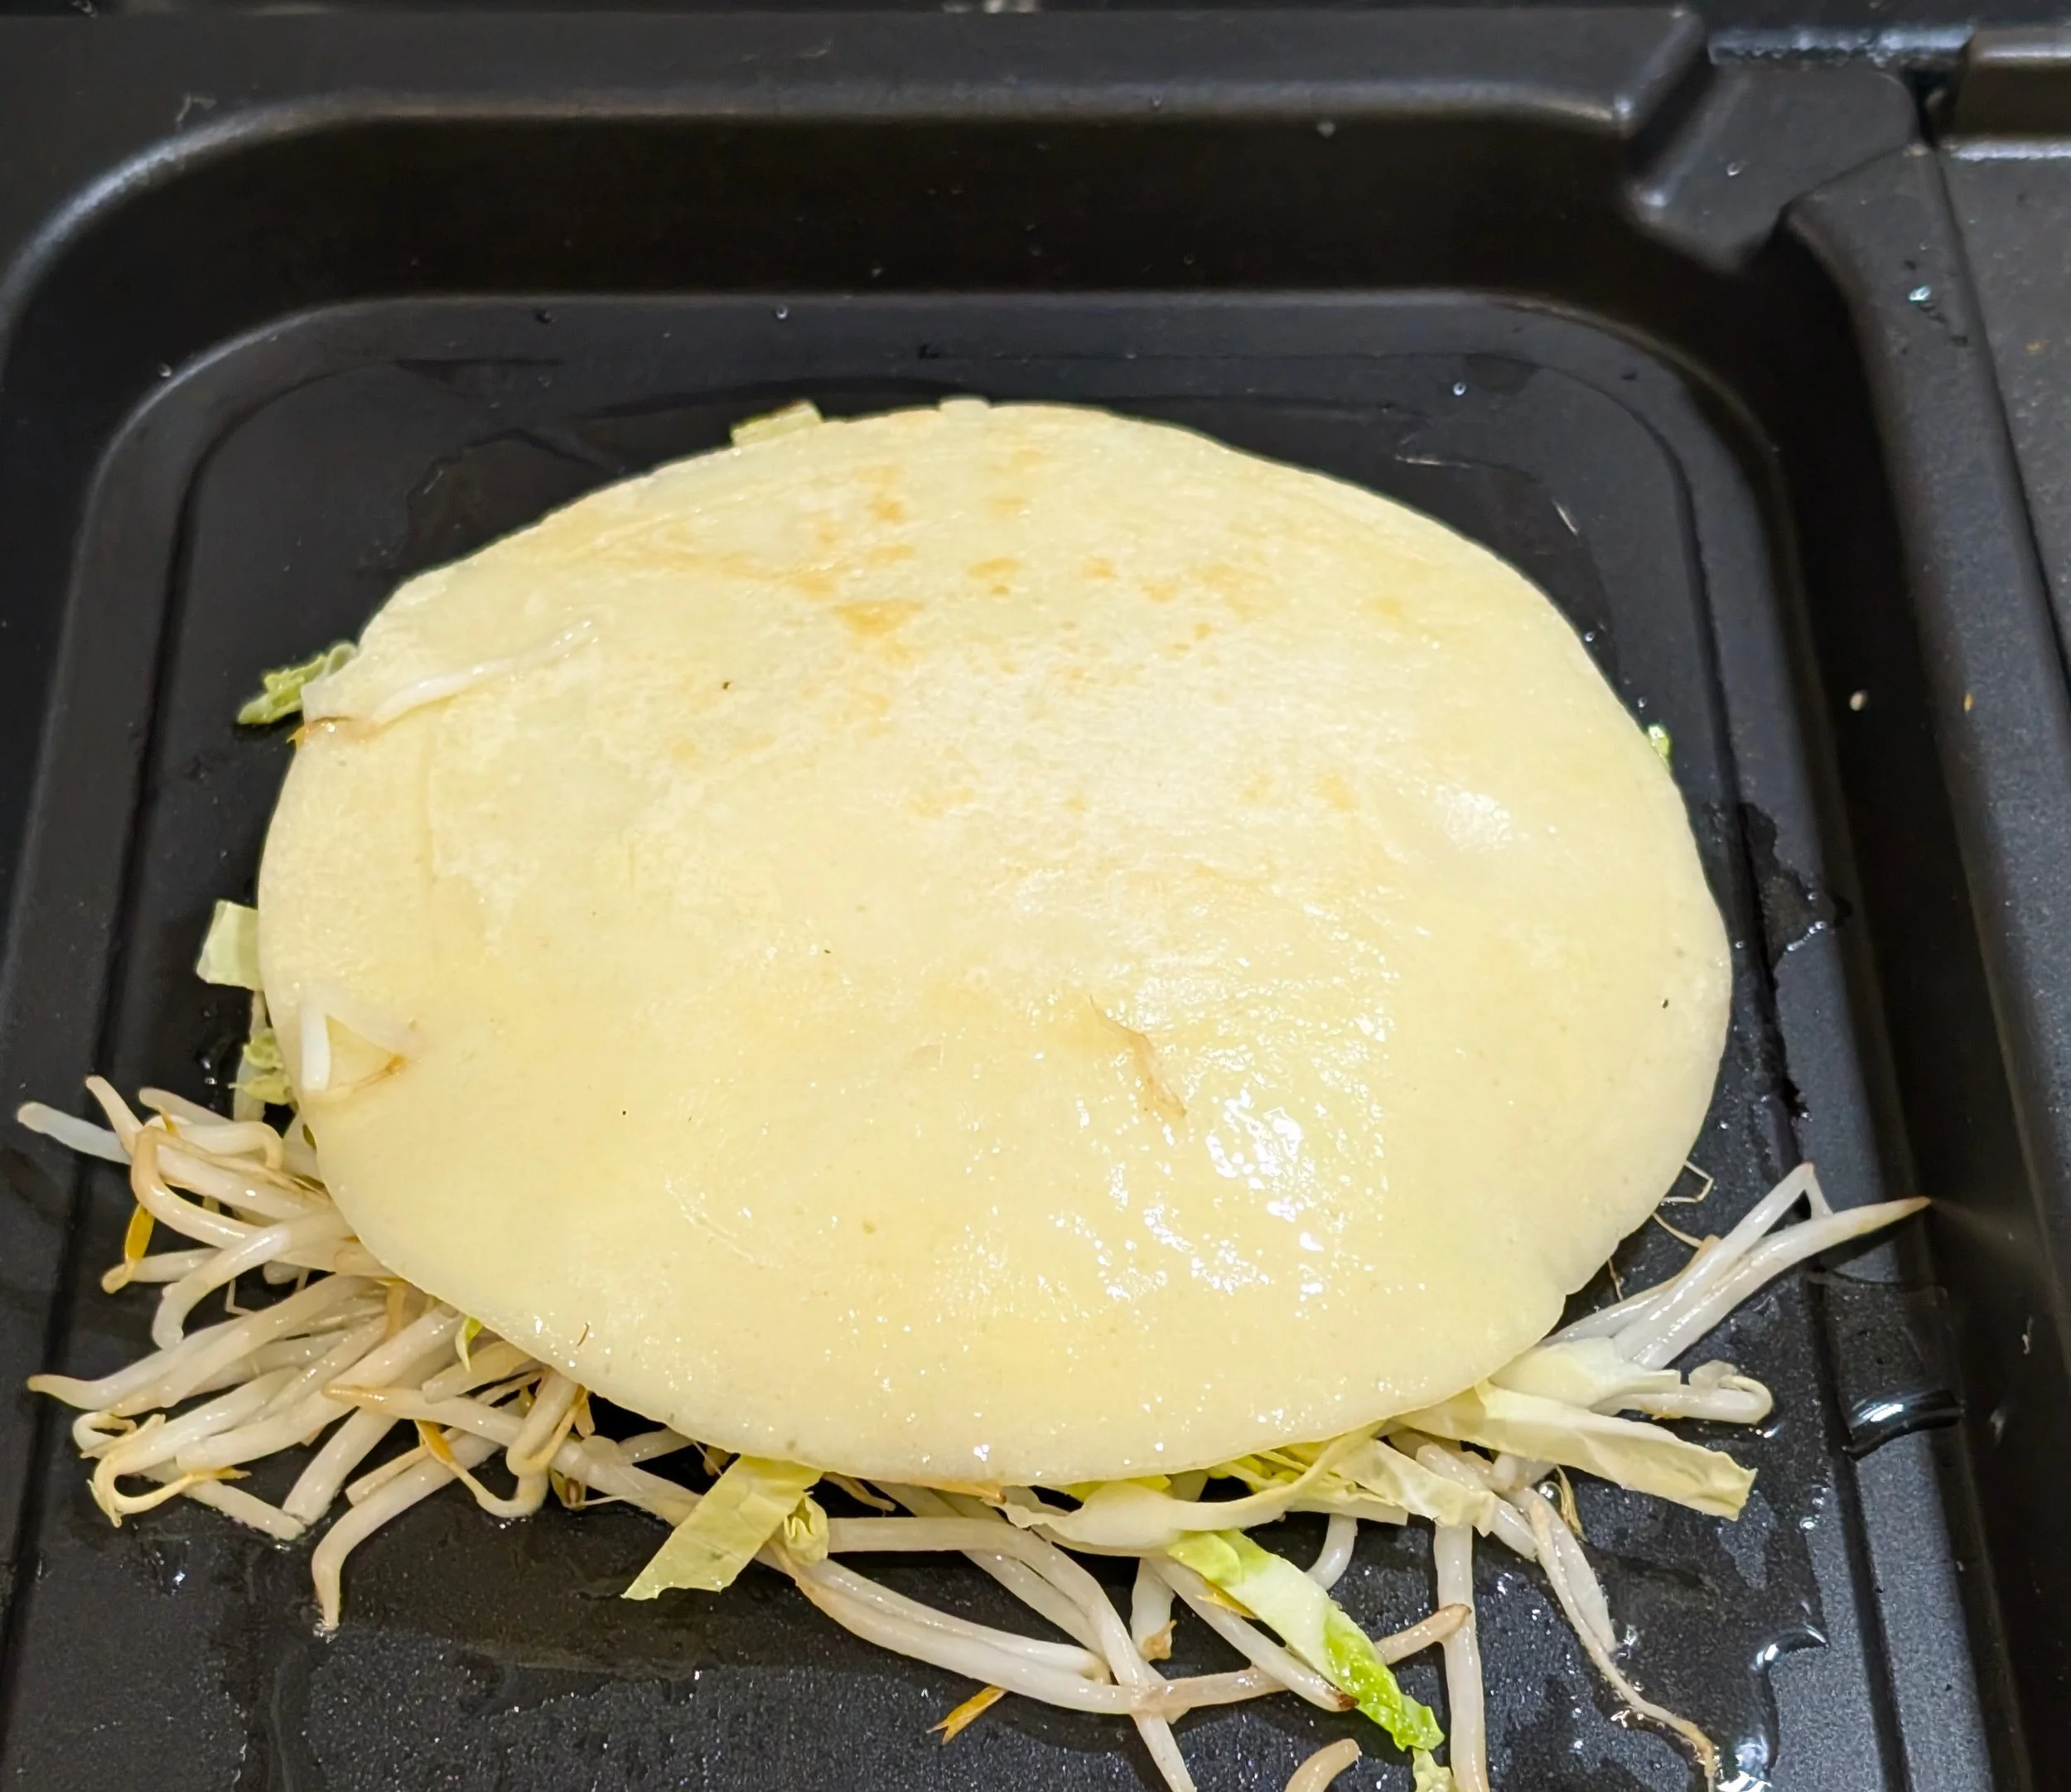
Photo 3
8. While that’s cooking, in another section of the hotplate (or in a second frying pan), add a pouch of straight-to-wok yakisoba noodles, and fry for a couple of minutes until they’ve loosened up to about the same shape as the pancake [photo 4];
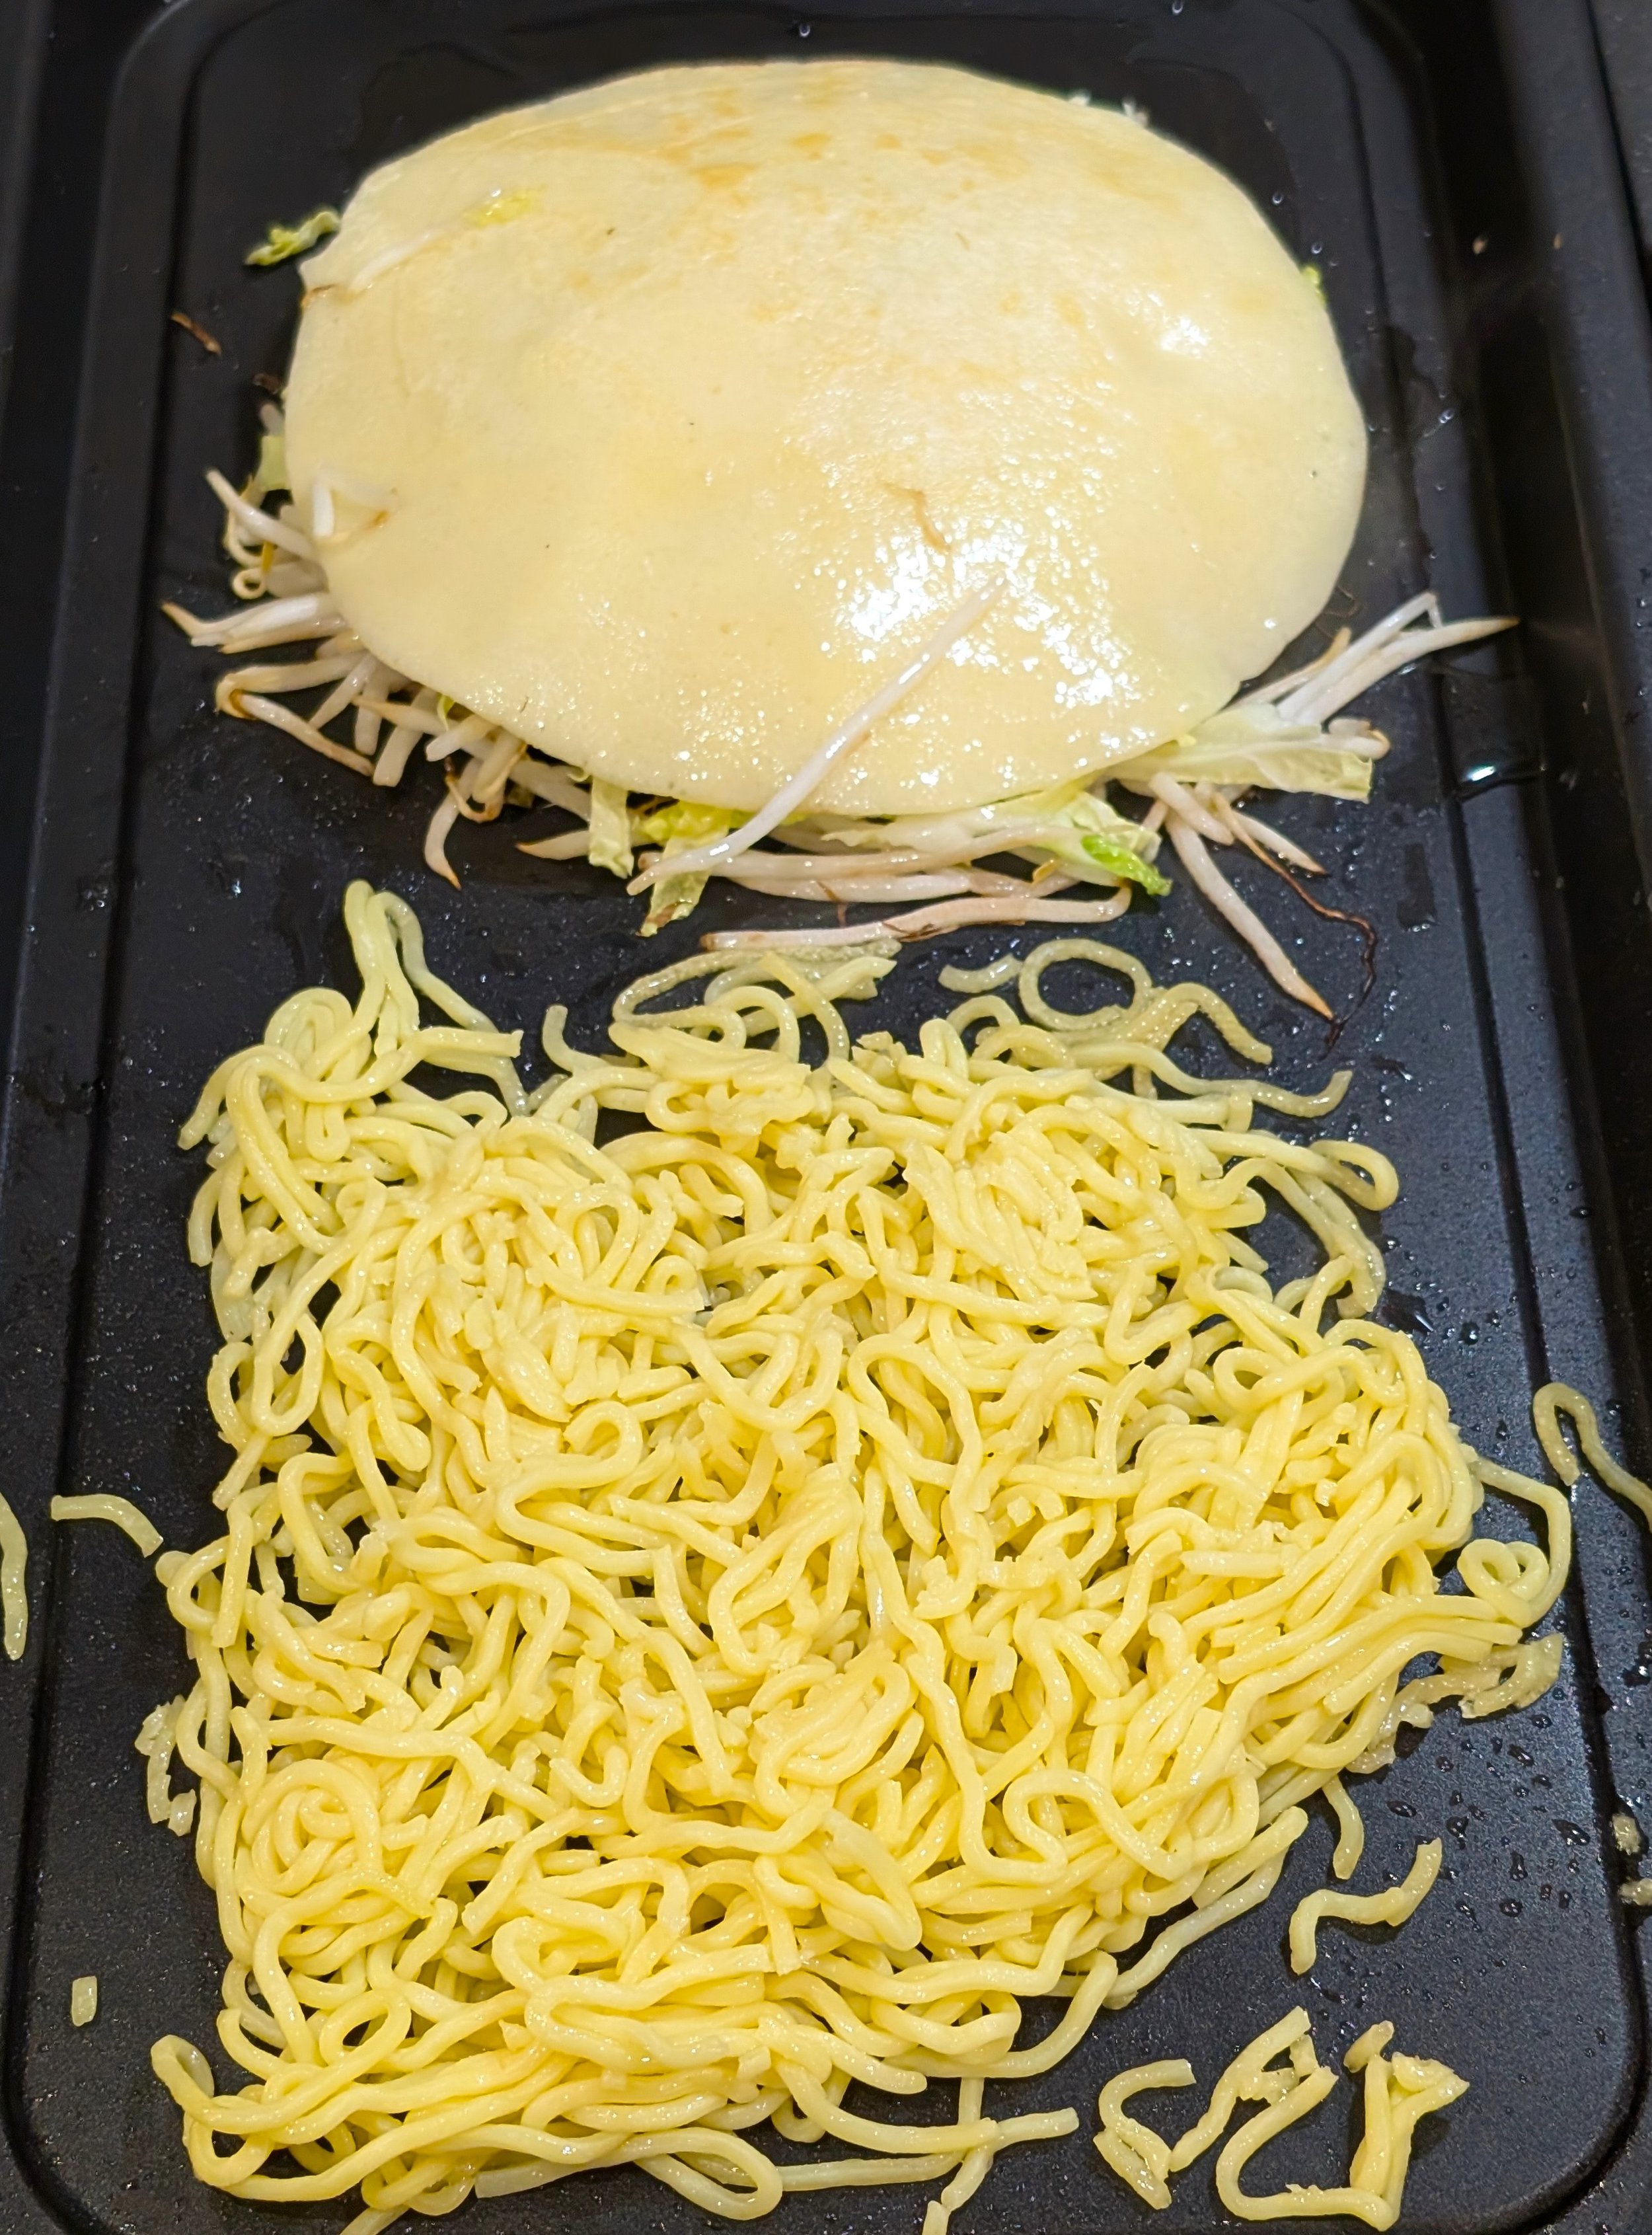
Photo 4
9. Lay the shredded chicken (or whatever protein source you prefer) on top of the fried noodles, and spread with a generous layer of okonomiyaki sauce [photo 5];
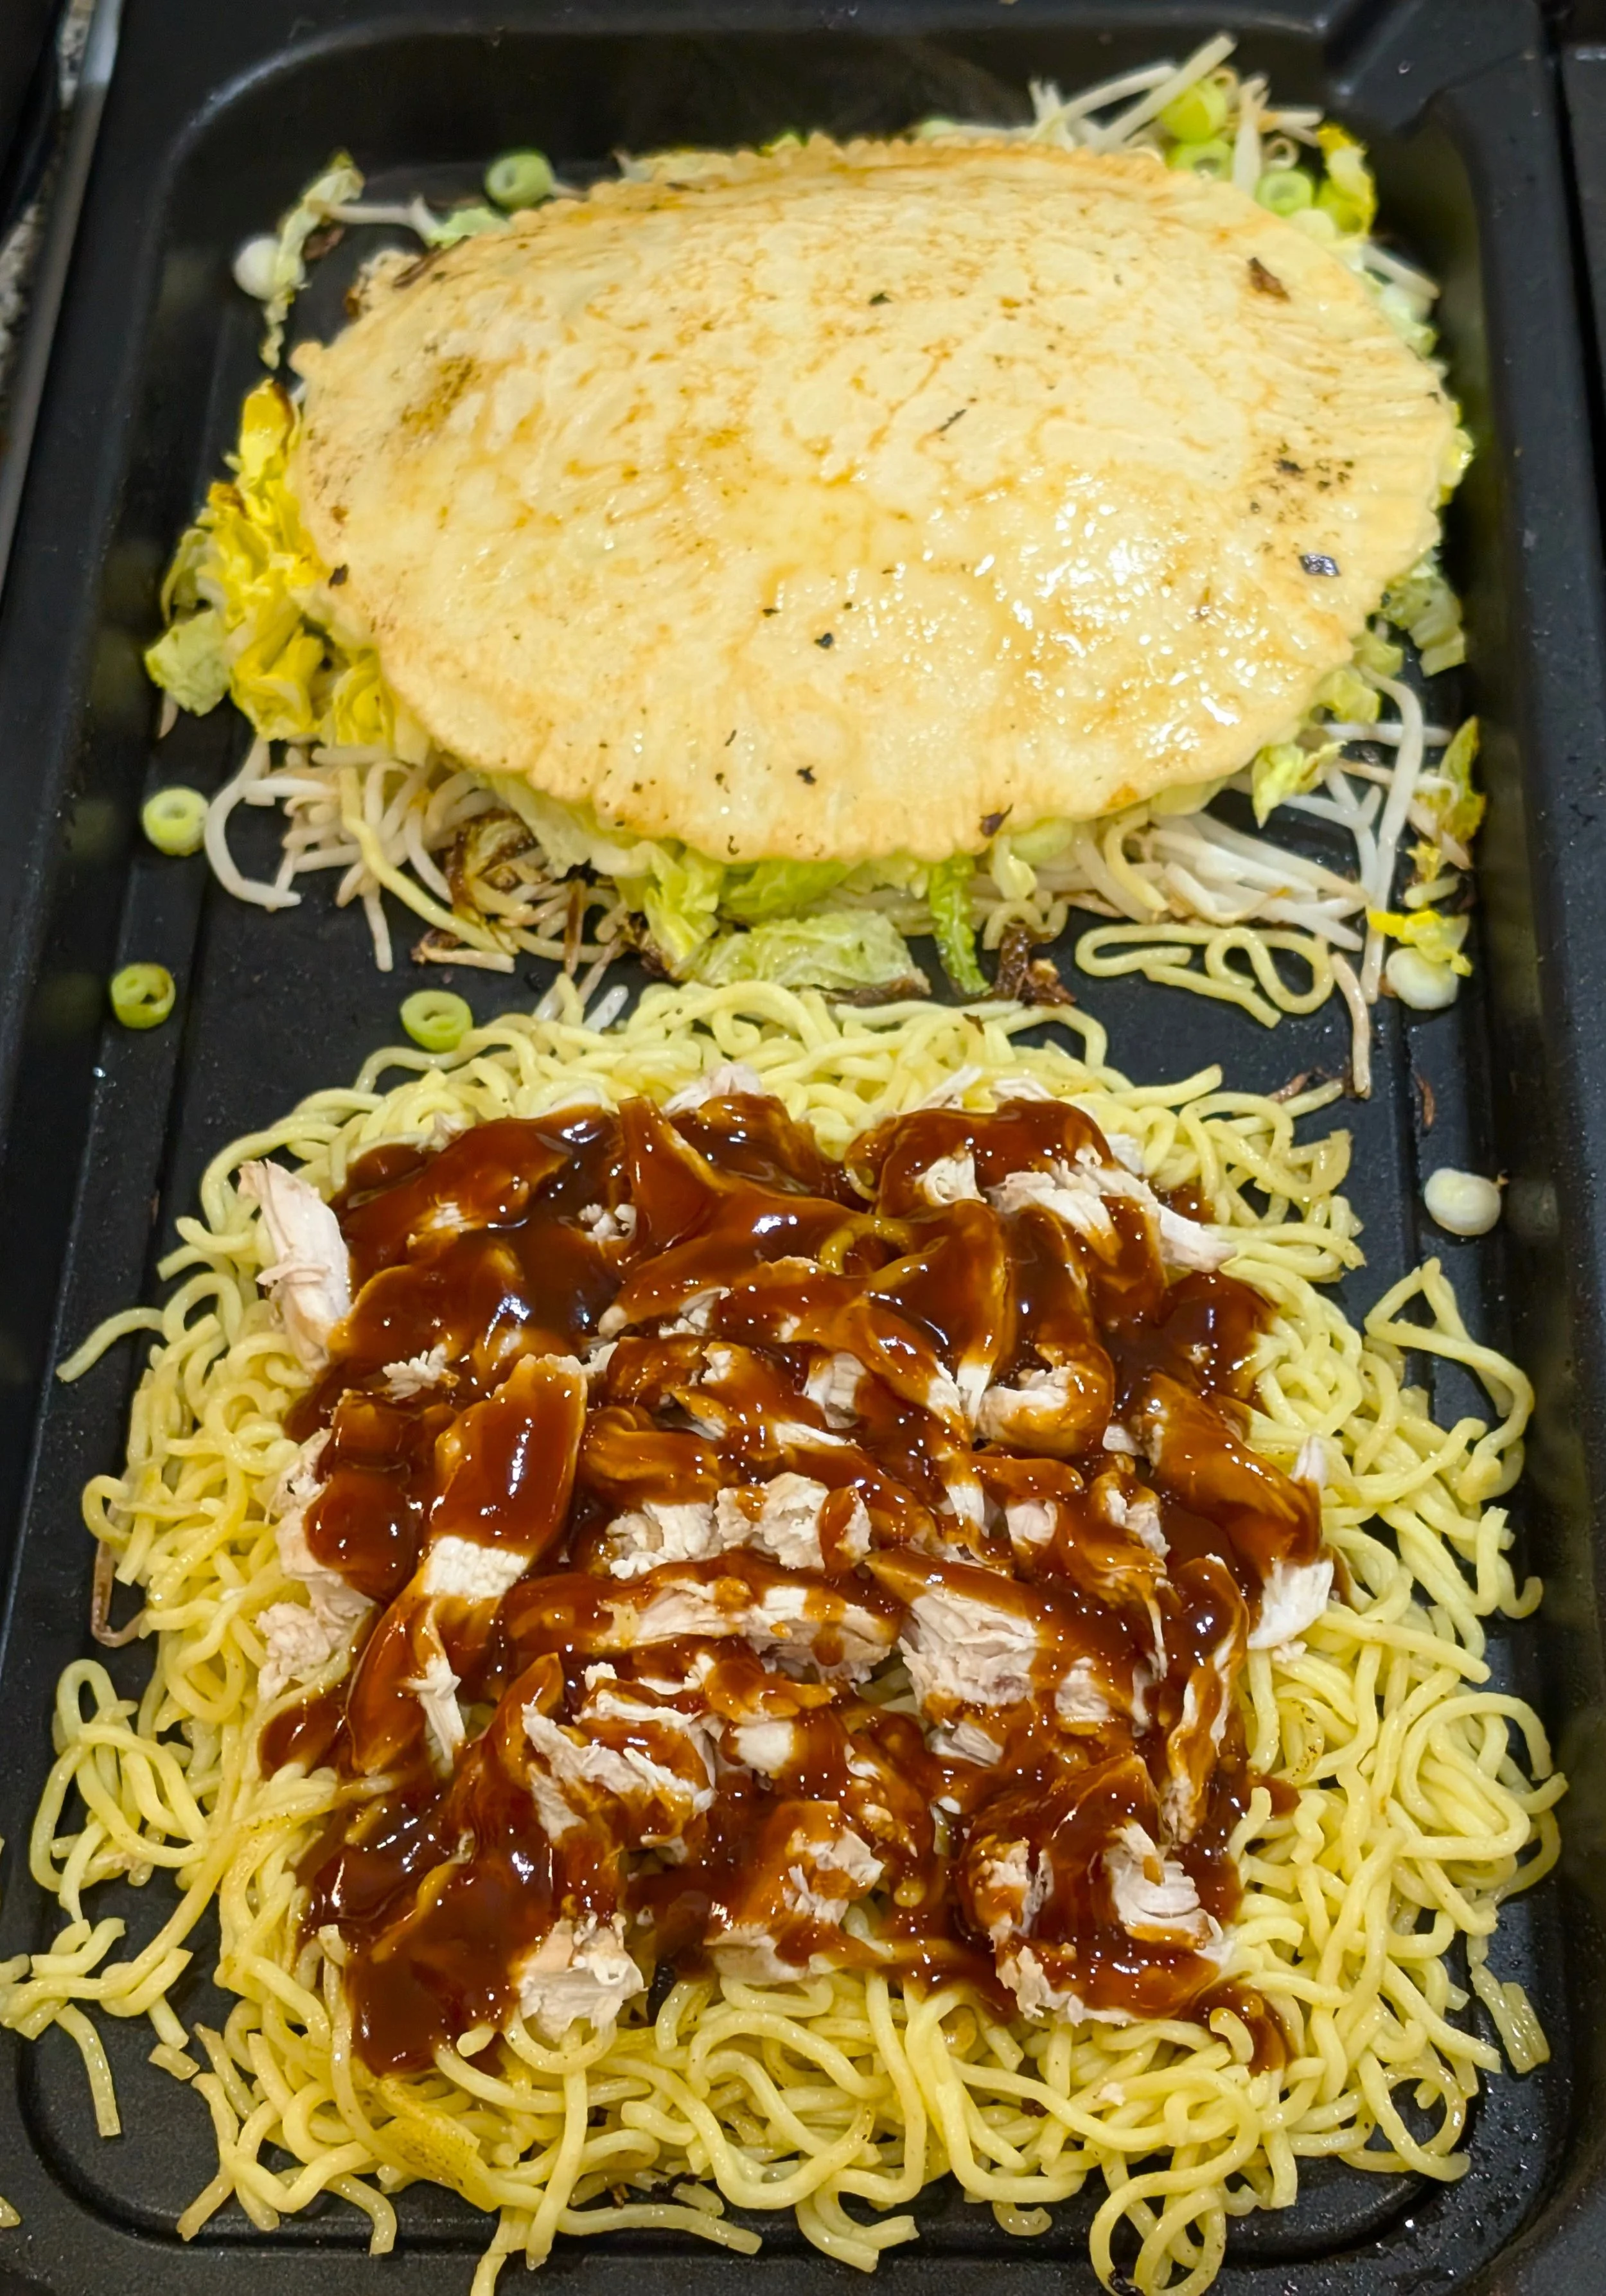
Photo 5
10. Now, using the two spatulas, lift the cabbage/beansprouts/pancake section on top of the noodles/chicken section [photo 6];
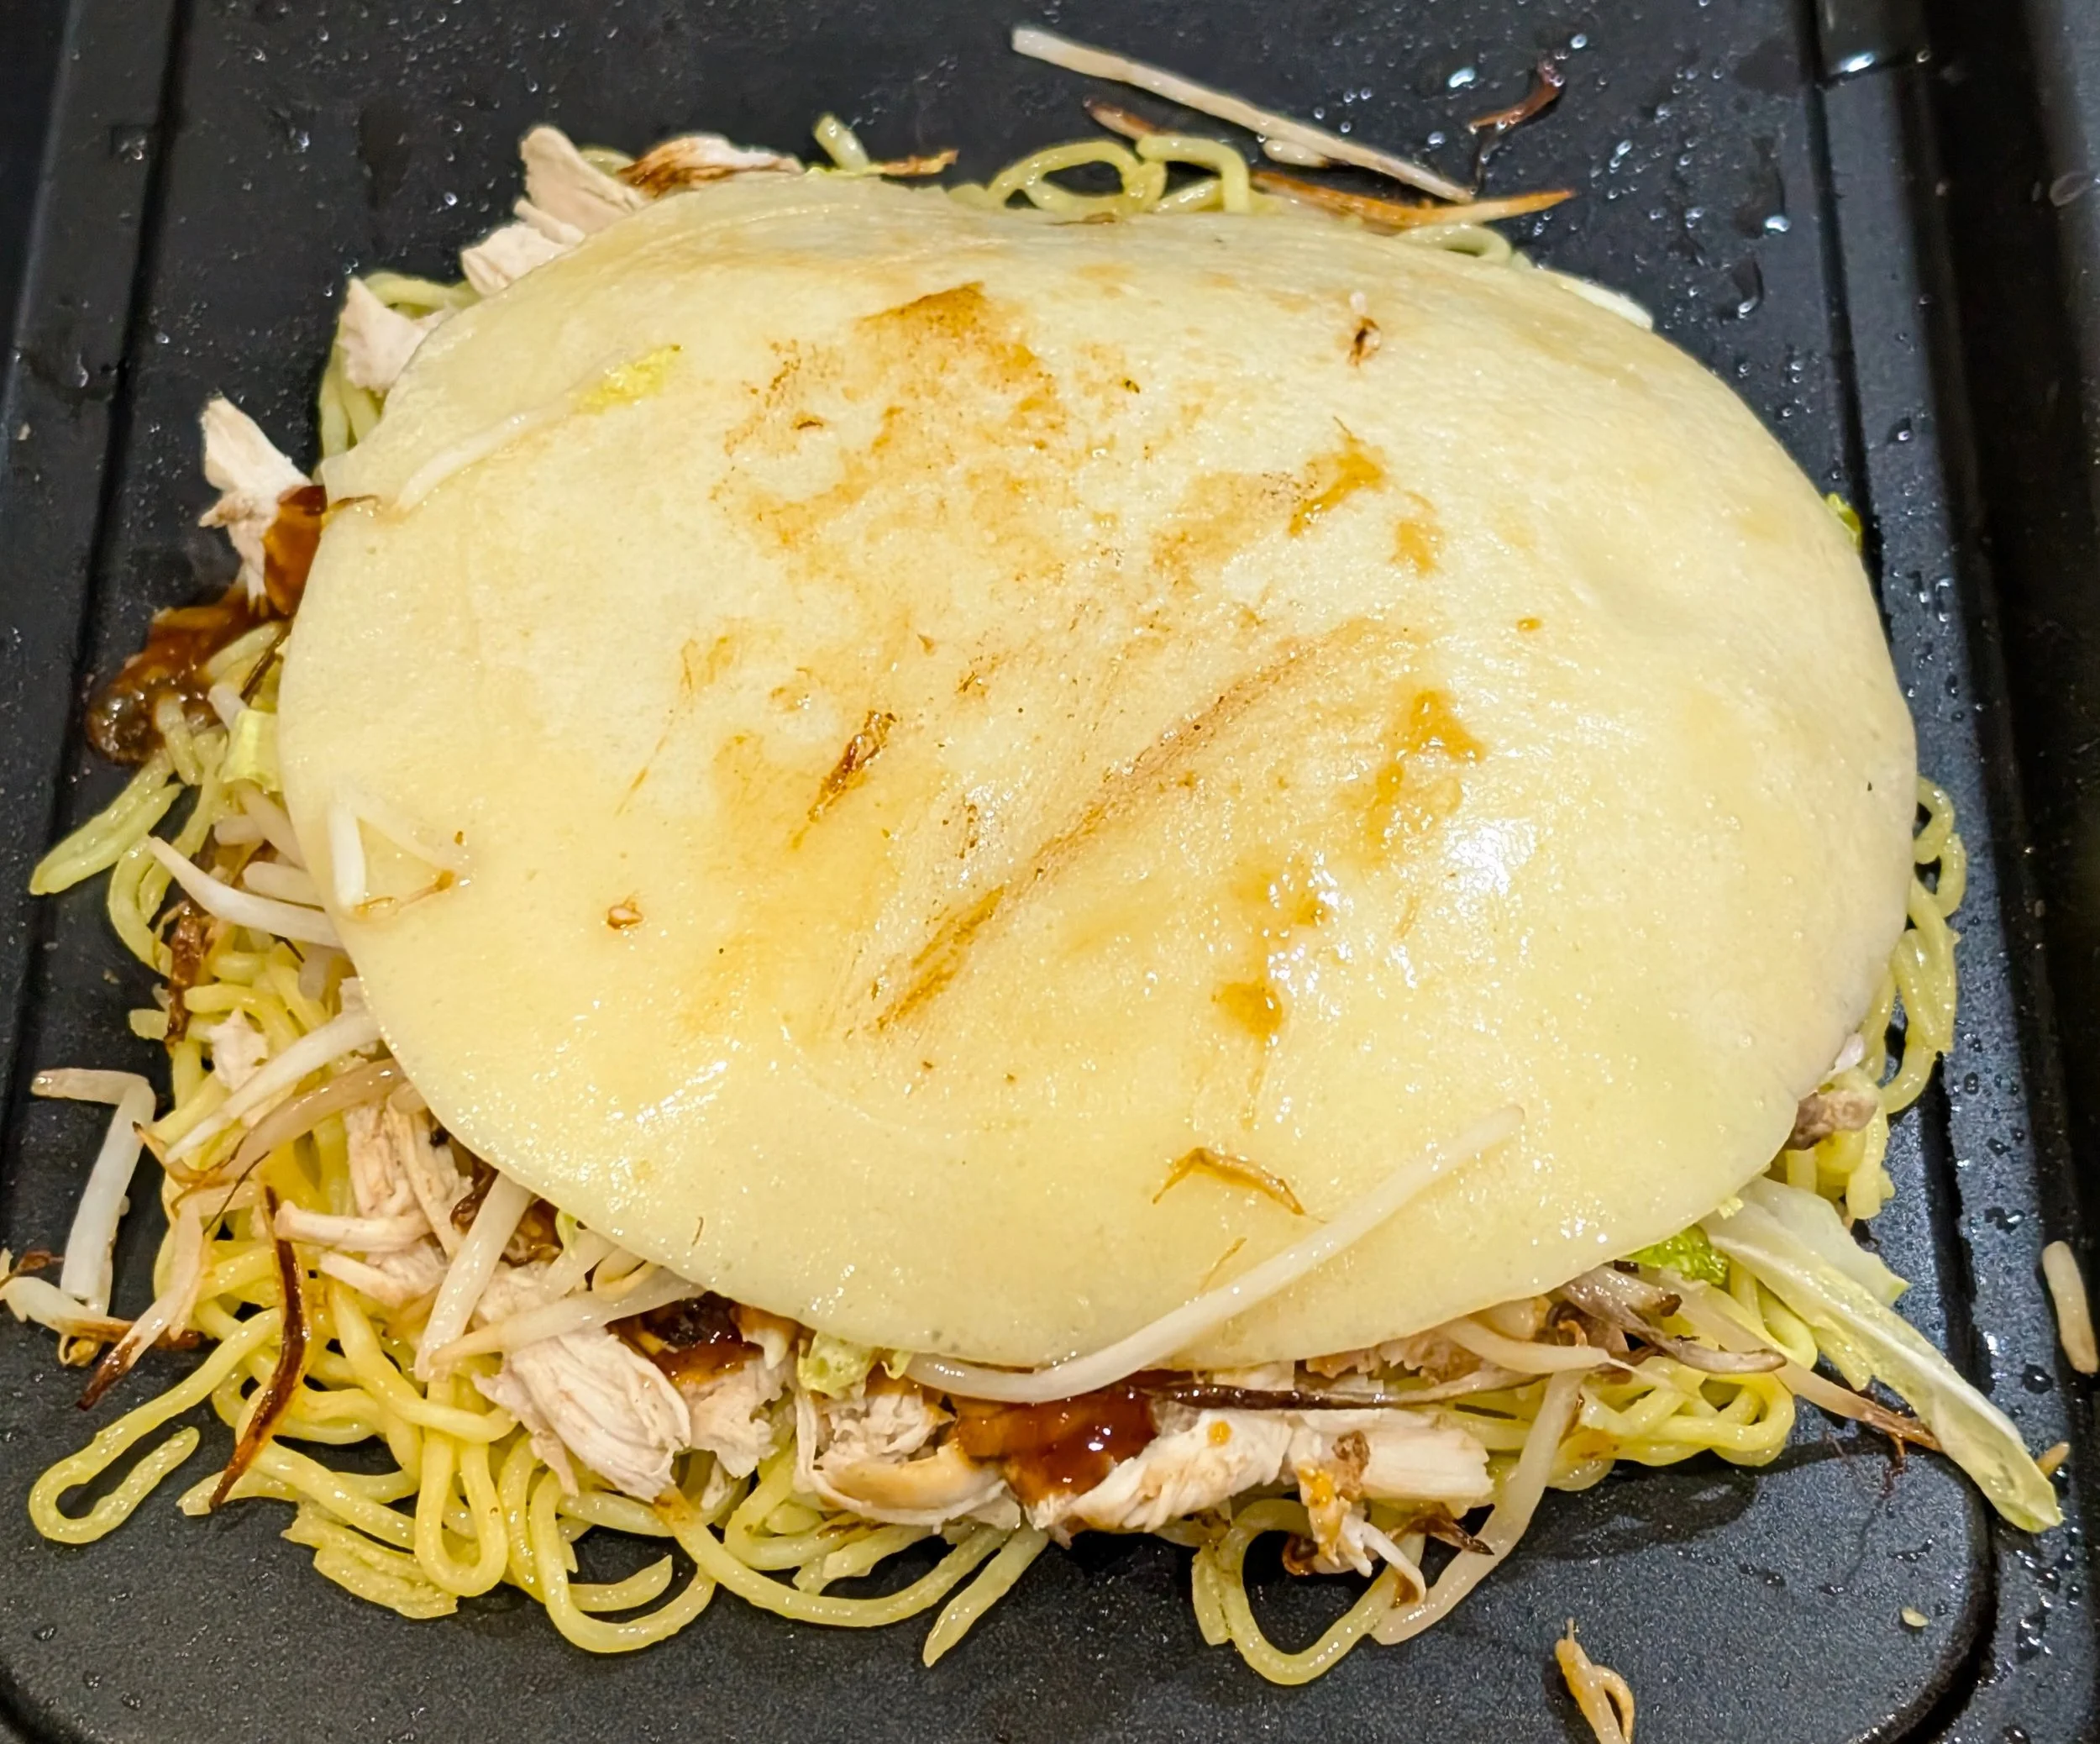
Photo 6
11. Crack an egg onto the hotplate/frying pan that you just removed the pancake section from, and break the yolk and mix around with a spatula (it’s not meant to be uniform, like an omelette, but it’s also not meant to have separate white/yolk like a fried egg). This will only need to fry for about a minute if the pan is hot enough [photo 7];
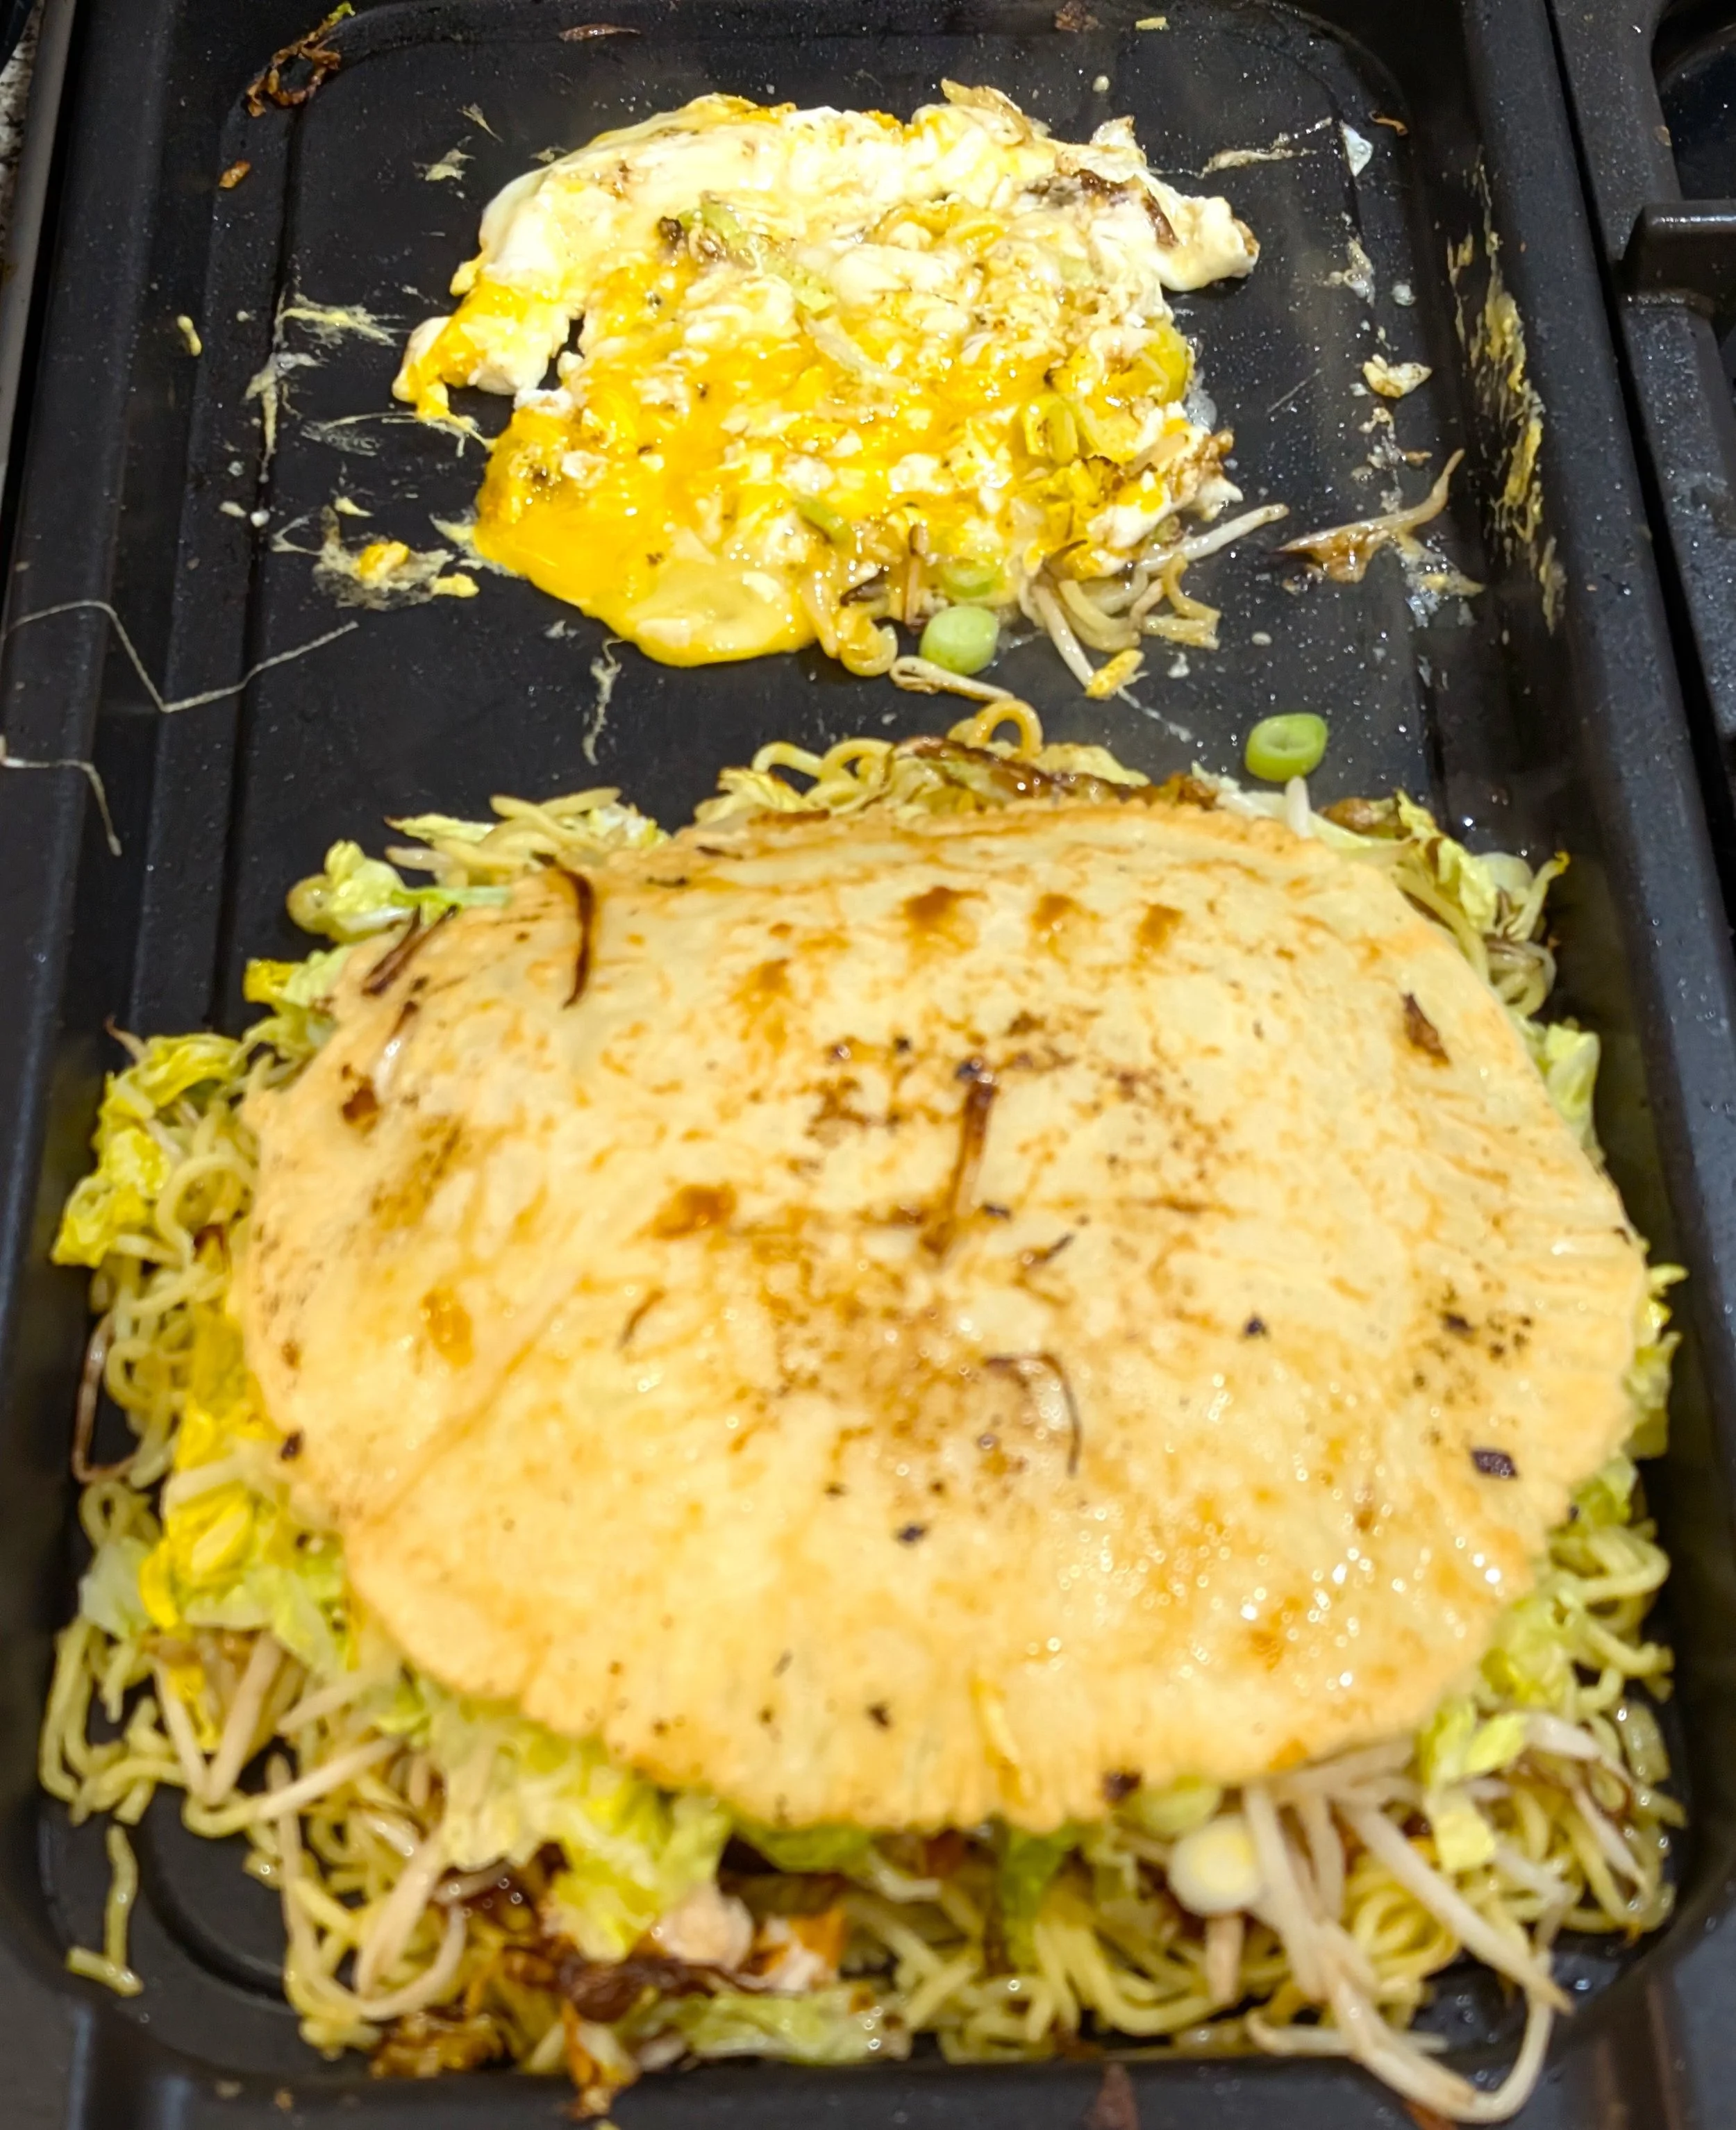
Photo 7
12. Finally, using the two spatulas, lift the rest of the okonomiyaki on top of the fried egg, and then flip the entire thing over (so that the pancake is on the bottom and the fried egg is on the top) onto a plate (if you’re eating straightaway) or baking sheet (if you’re keeping it warm while you make the others);
13. When you’re ready to dish up, use a cooking brush to paint some more okonomiyaki sauce over the fried egg on top, and sprinkle with furikake seasoning and the spring onion greens [photo 8].
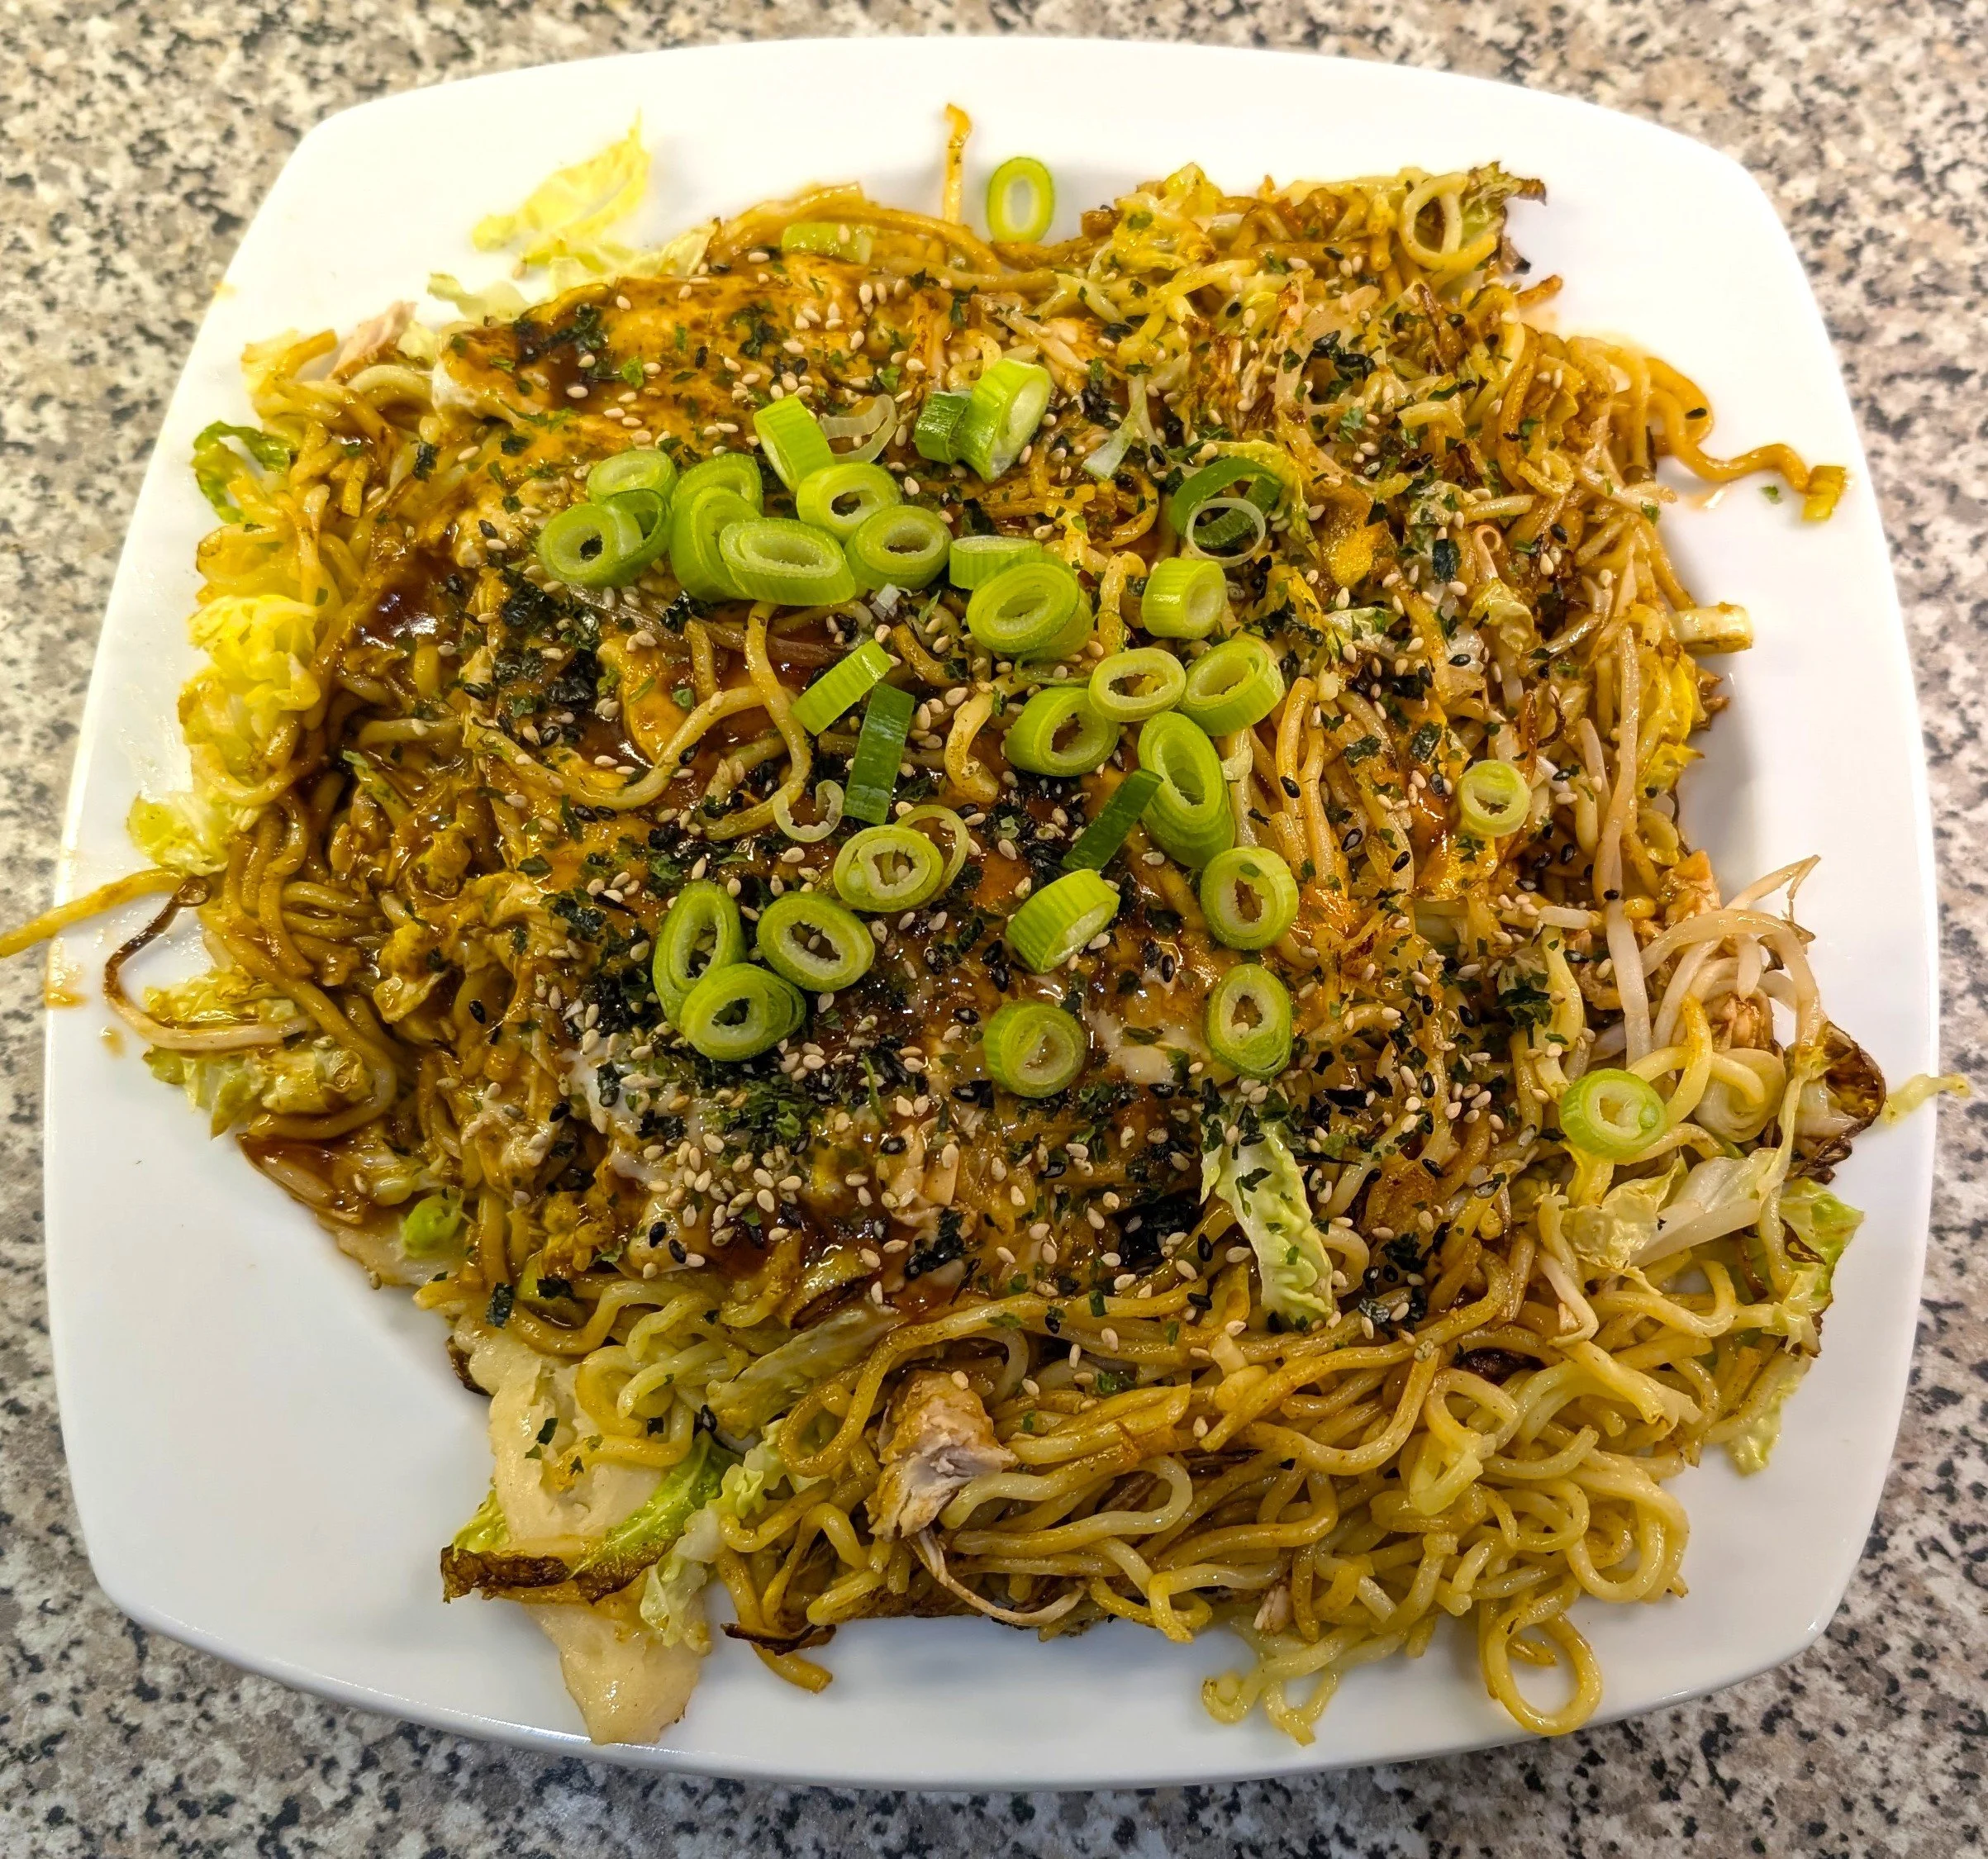
Photo 8
You could swap the shredded chicken for bacon or prawns/seafood, and add other seasoning like kewpie mayonnaise or dried bonito flakes, but this is my personal favourite version!
Okonomiyaki (Hiroshima-style)